-p-2000.jpg%3F_a%3DBAMABkeA0&w=3840&q=75)
Get Started How To Create An Online Booking System: The Ultimate Guide
Are you struggling to streamline your workload and take bookings easily and effectively? Have no fear! Using Baluu’s online booking system is a piece of cake. In this walkthrough, we’ll show you how to create an online booking system in a matter of hours.
Before the internet, taking bookings for your business was a time-consuming, laborious endeavour. Not only was it difficult to advertise your business, but most bookings were made over the phone. That’s a lot of unnecessary hours that could be put into growing your business.
Fortunately, today, business owners are able to utilise booking software to great effect. What separates Baluu from the rest of the pack is its ease of use and comprehensive tools. Providing an all-in-one software solution to small to medium businesses, Baluu allows you to create your own website, take bookings and add payments on one slick, user-friendly platform.
Below, we’ll guide you, step-by-step, to making your very own online booking system. We’re confident that, after following this guide, you’ll know everything you need to know to start taking bookings today!
Step 1 - Create events/activities
First things first, let’s create your events and/or activities. On the dashboard, click on Listings and click “Add Listing”.
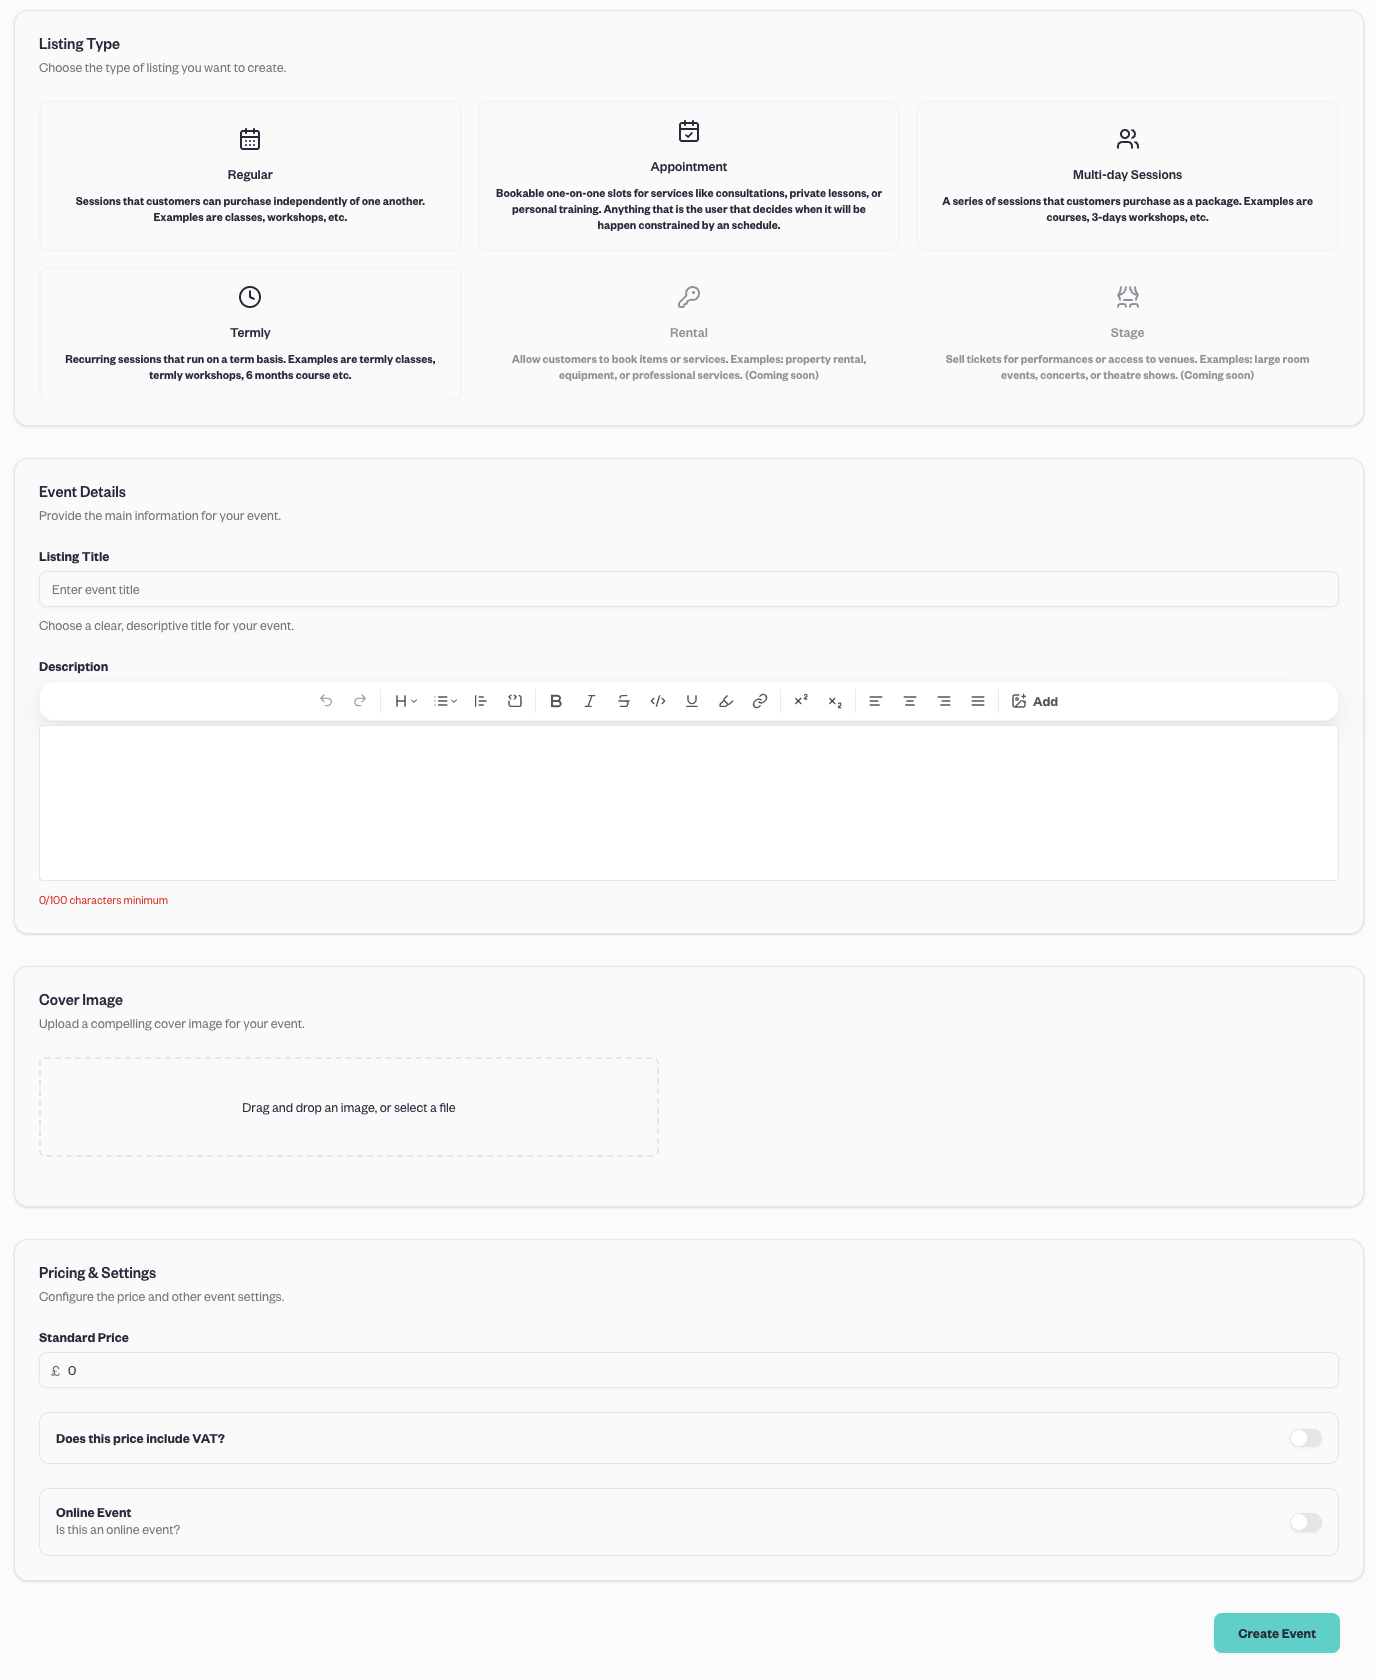
Choose your event type. Baluu currently offers several options:
- Appointment: One-on-one bookable slots for services like consultations, private lessons, or personal training.
- Regular: Standalone sessions that customers can book individually — great for classes, workshops, and drop-ins.
- Multi-Day: A bundle of sessions purchased as a package, such as a course, weekend workshop, or 3-day retreat.
- Termly: Recurring sessions that run over a fixed period (a term), ideal for term-based classes, long courses, or after-school programs.
- Rent (upcoming): Allow customers to book items or services, like equipment or space rentals.
- Stage (upcoming): Sell tickets for performances or grant access to venues — perfect for concerts, theatre shows, and large-scale events.
Once you’ve chosen the event type, you can add event title, description, image, price, and public keywords.
After this, click Create event at the bottom of the page. Bear in mind that this event will be saved as a draft until your website is published, at which point it will be available to customers.
Now, when you click on All Events, you’ll see your recently added event.
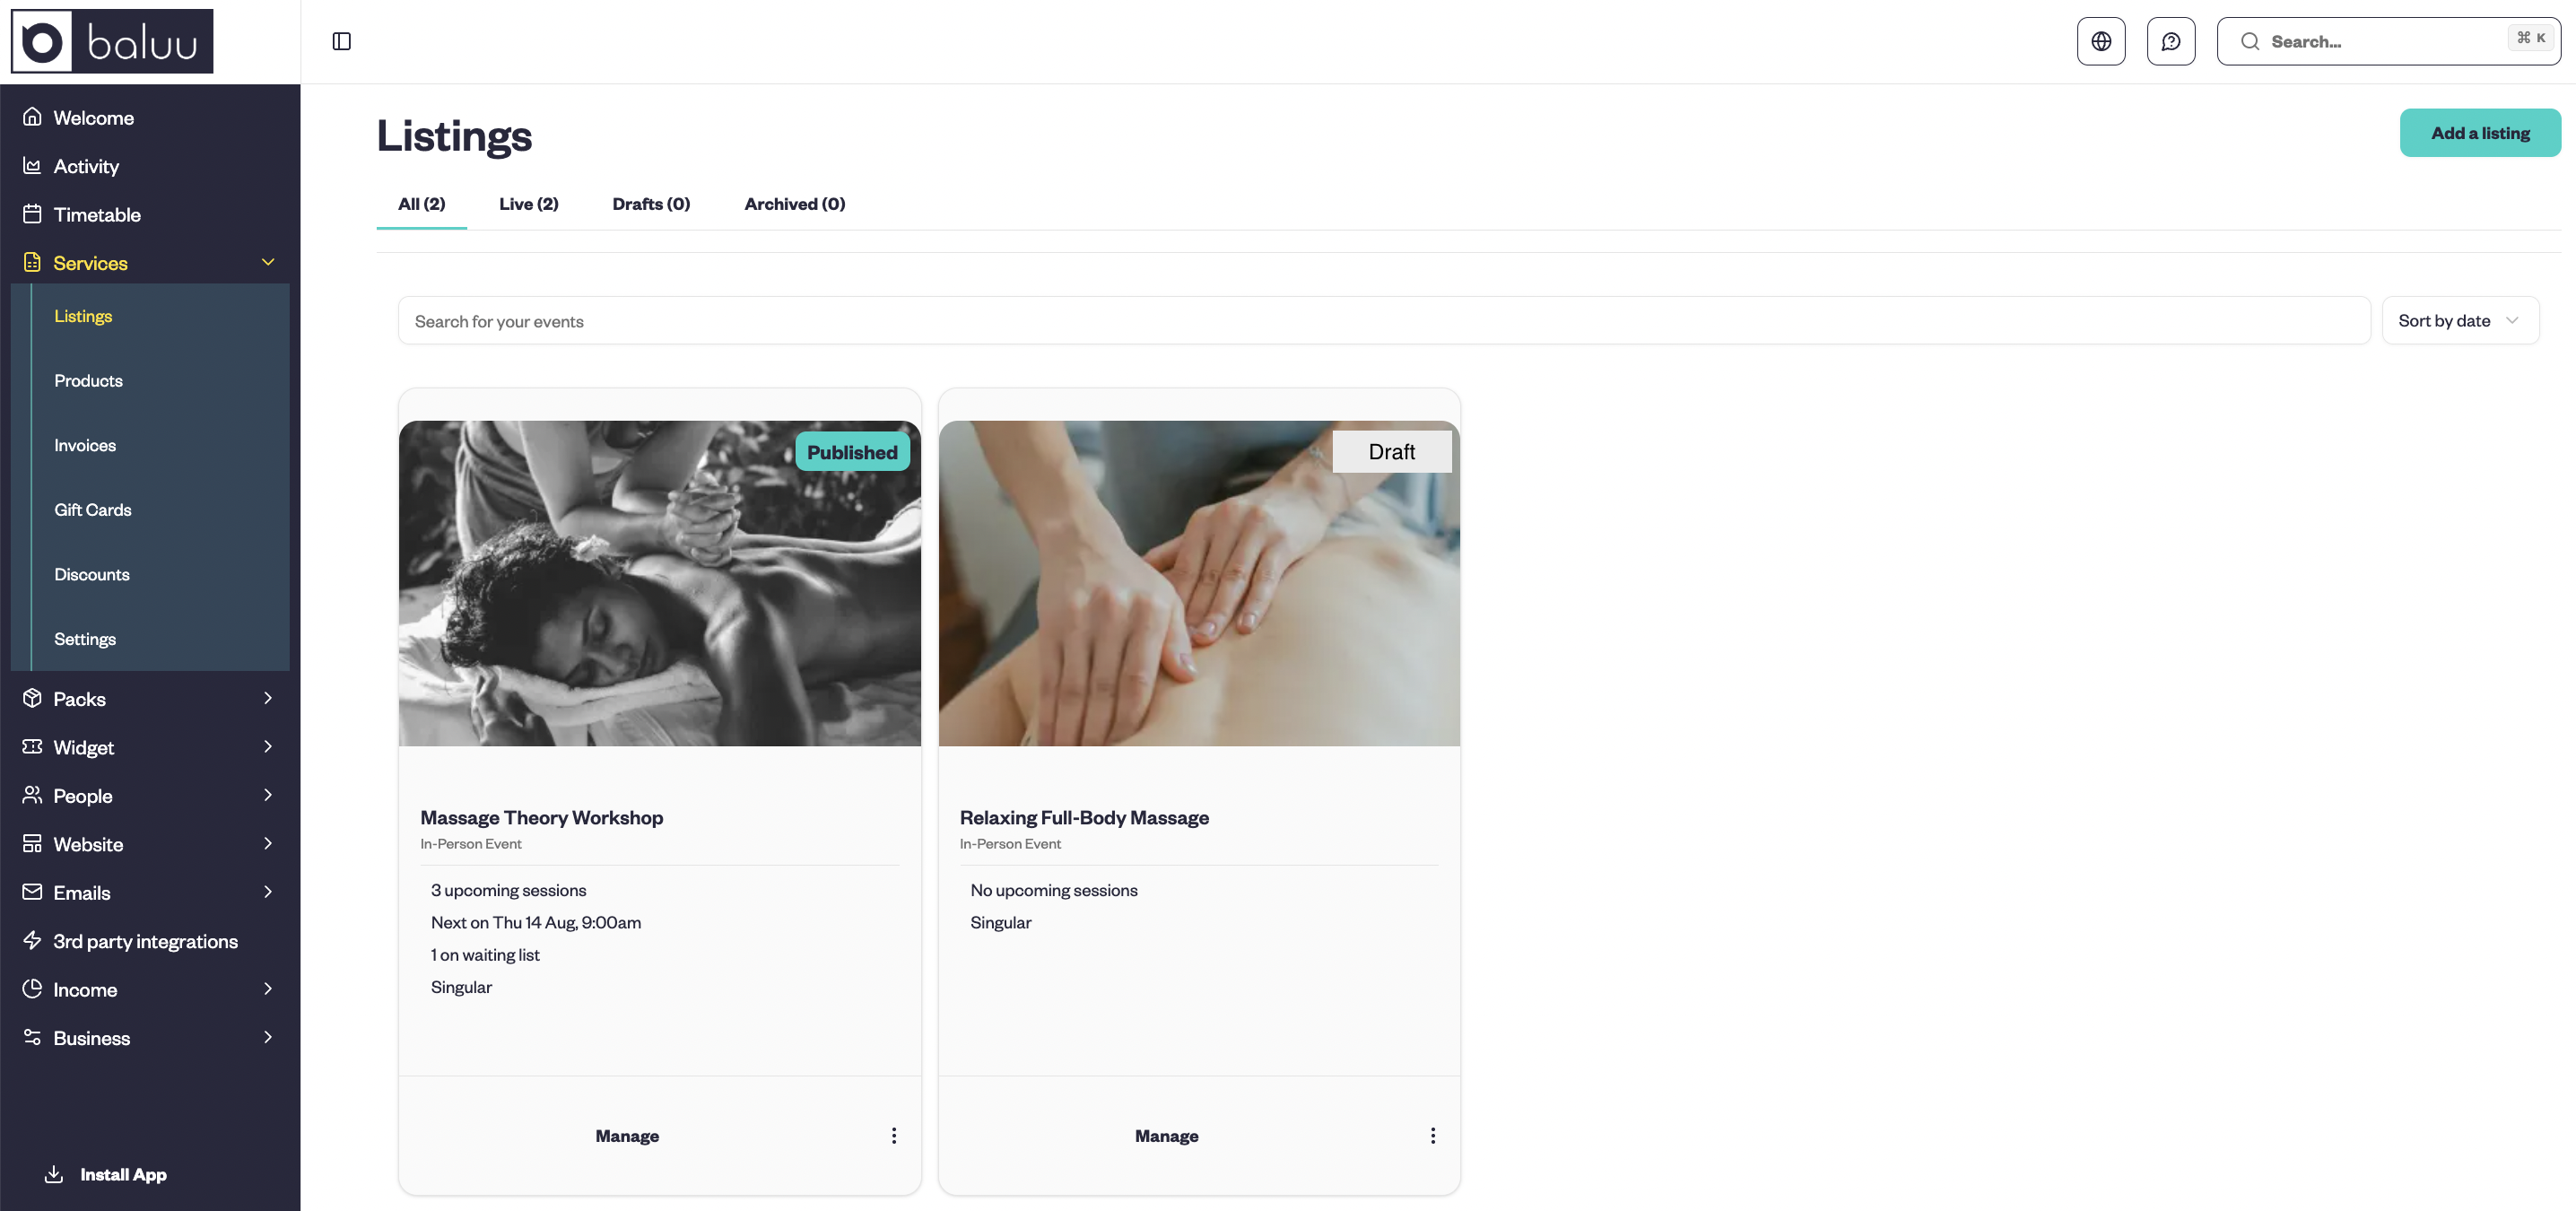
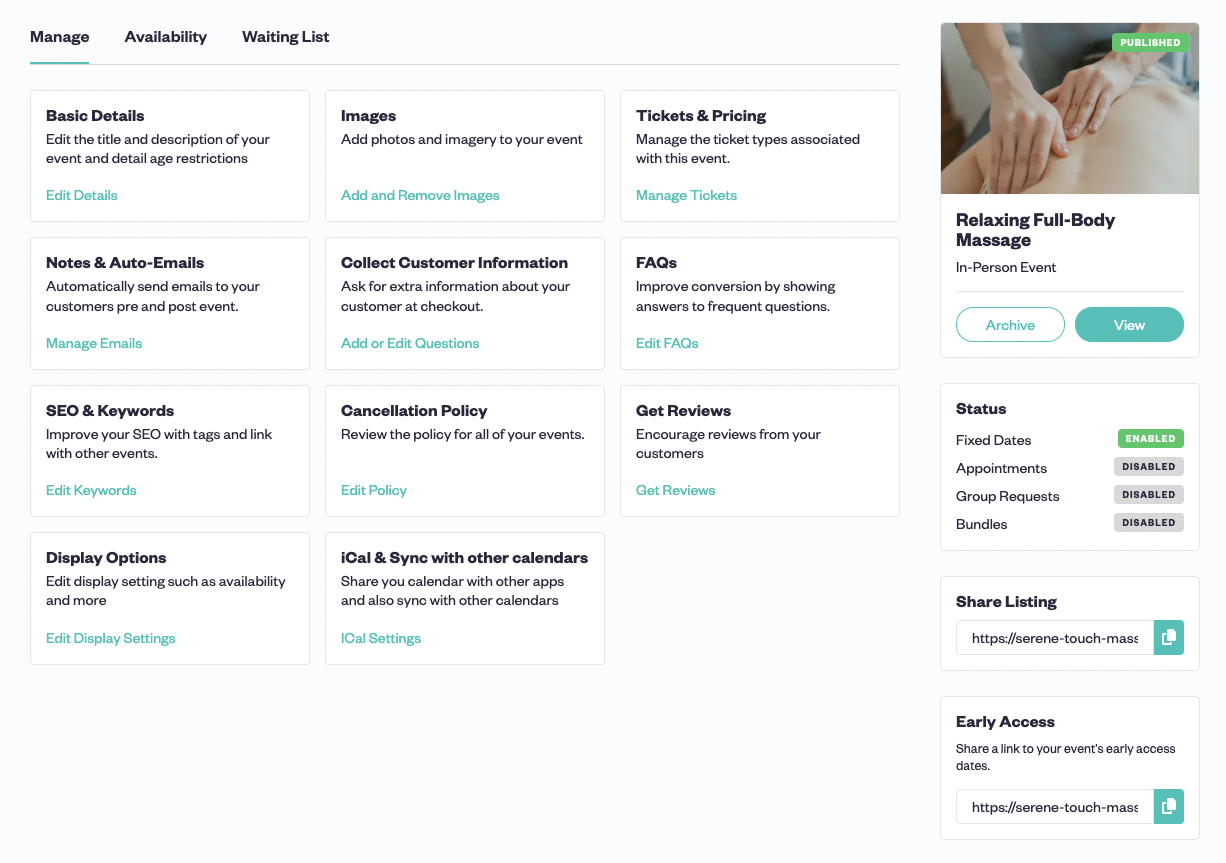
But there’s still a little more information you need to add before the event can be published. Click Manage on the Event box and it will bring up a window where you can add more detail to your event.
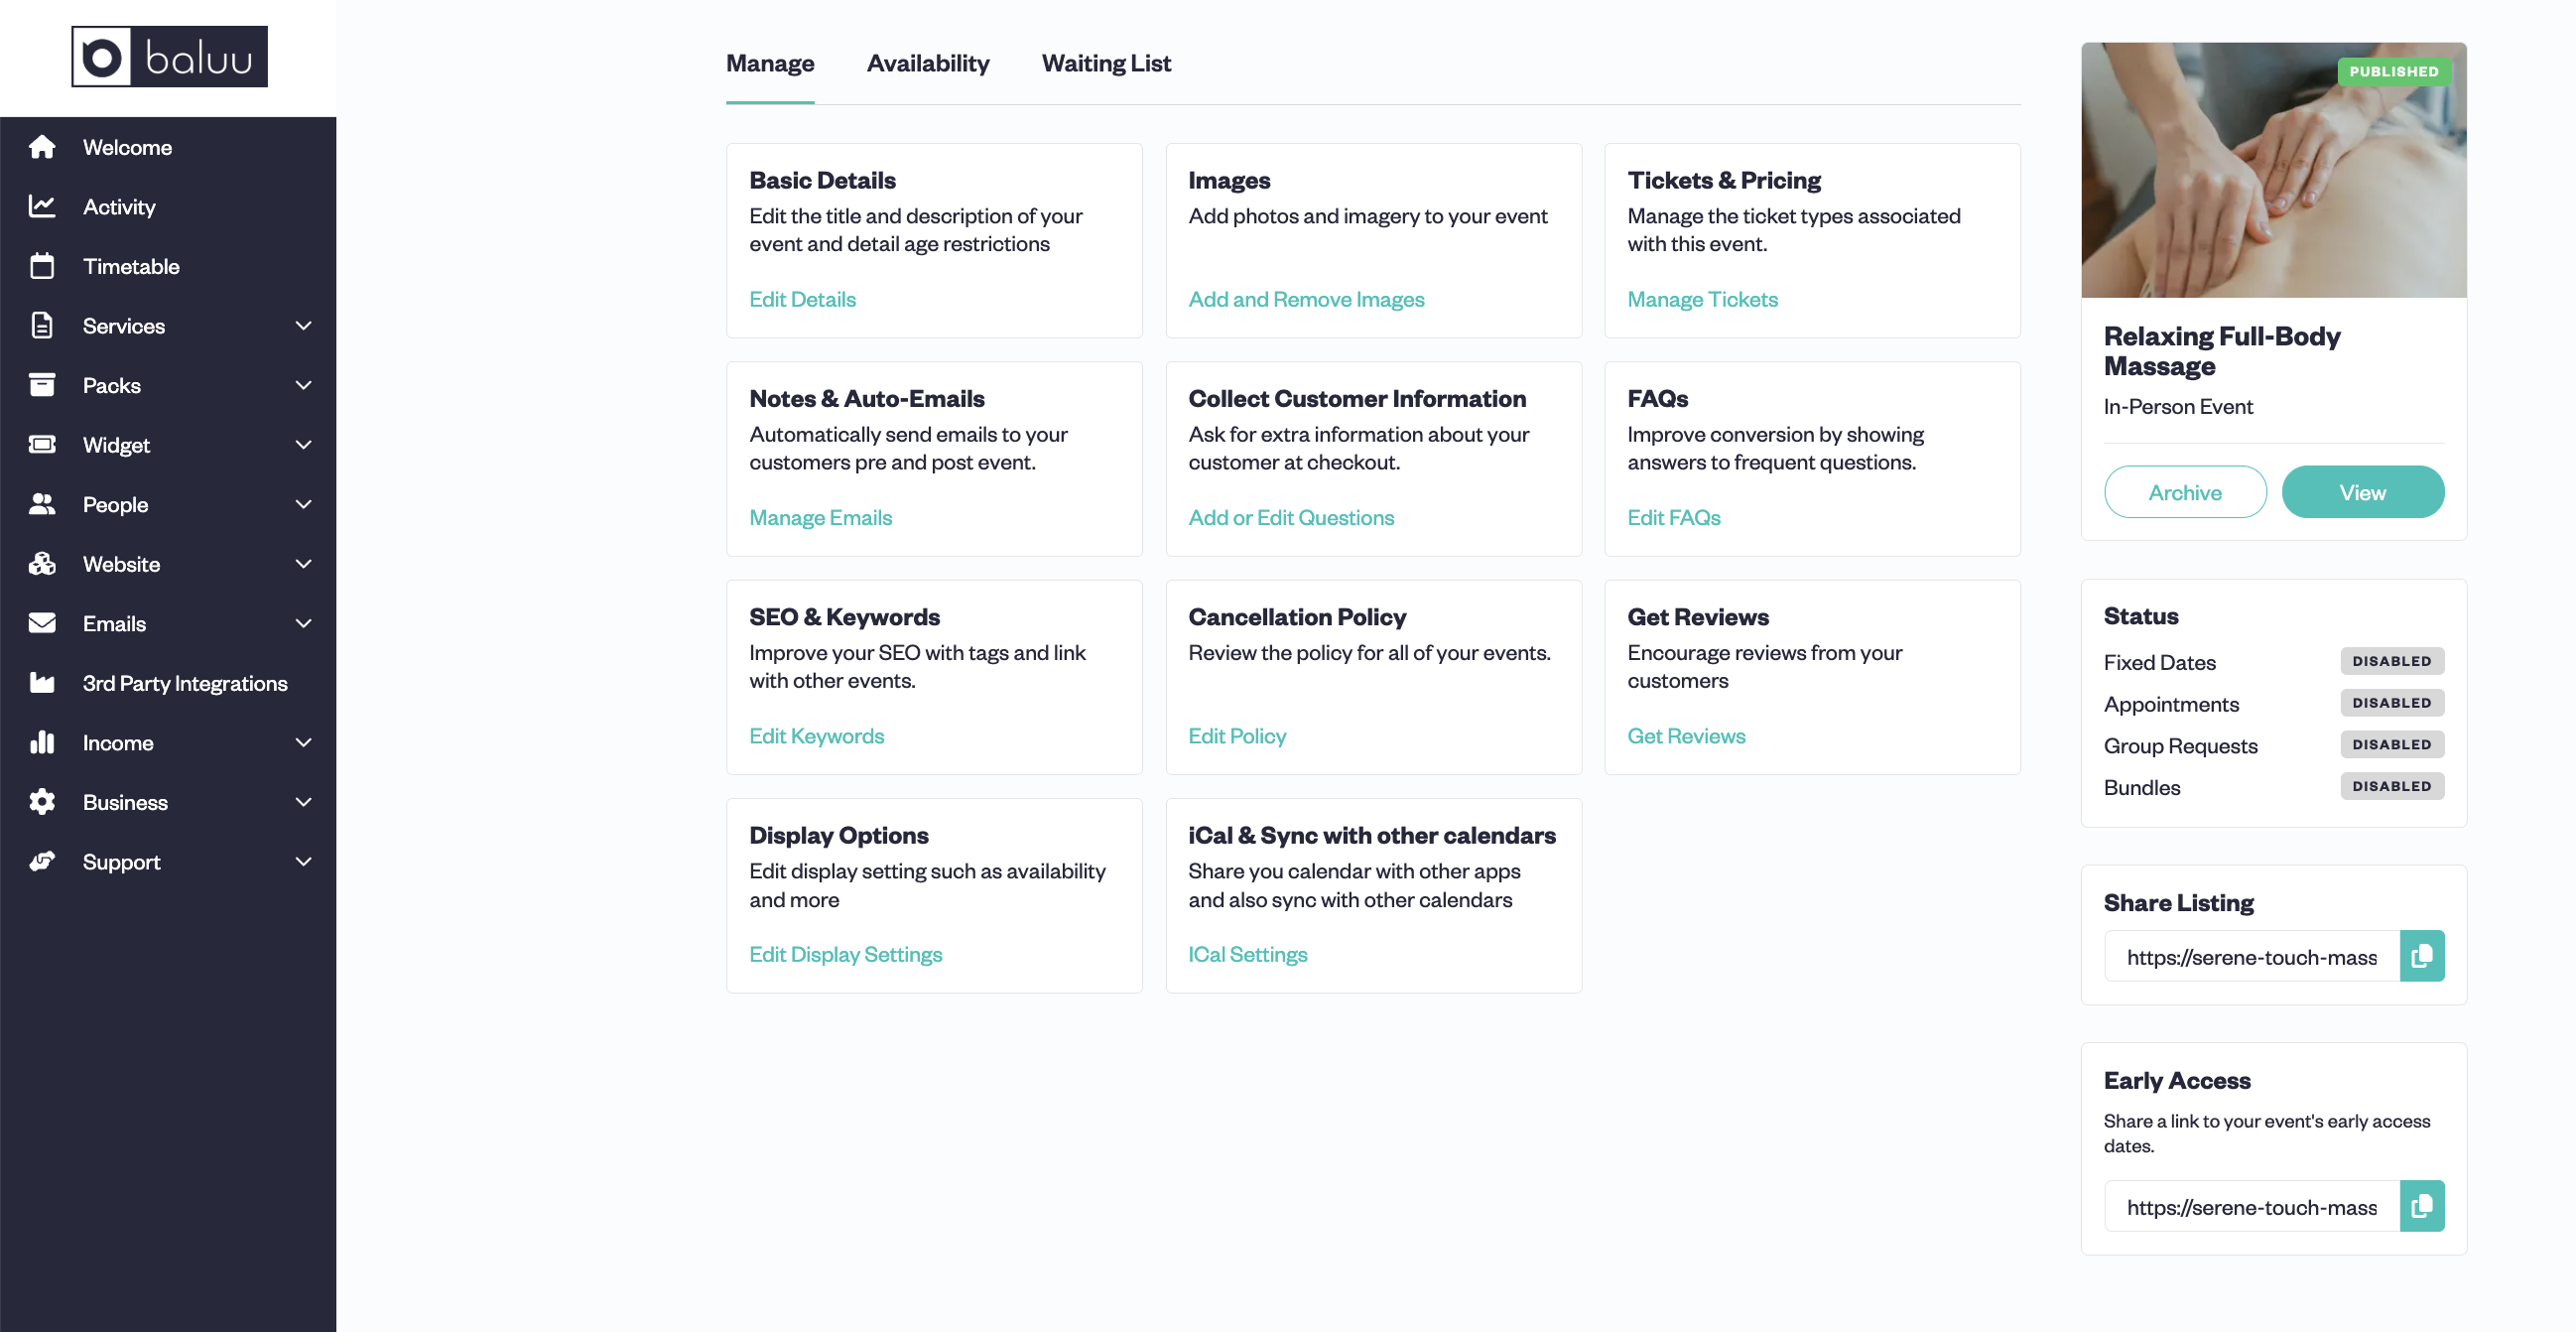
Here you can fine tune your SEO, automate Collect Customer Information for more info on your customers, include FAQs, and more. We’ll cover this in more detail later. For now, in order to get the event online, you need to add dates to your timetable.
Click on Availability in the top menu, then add your availability by choosing one of the following options:
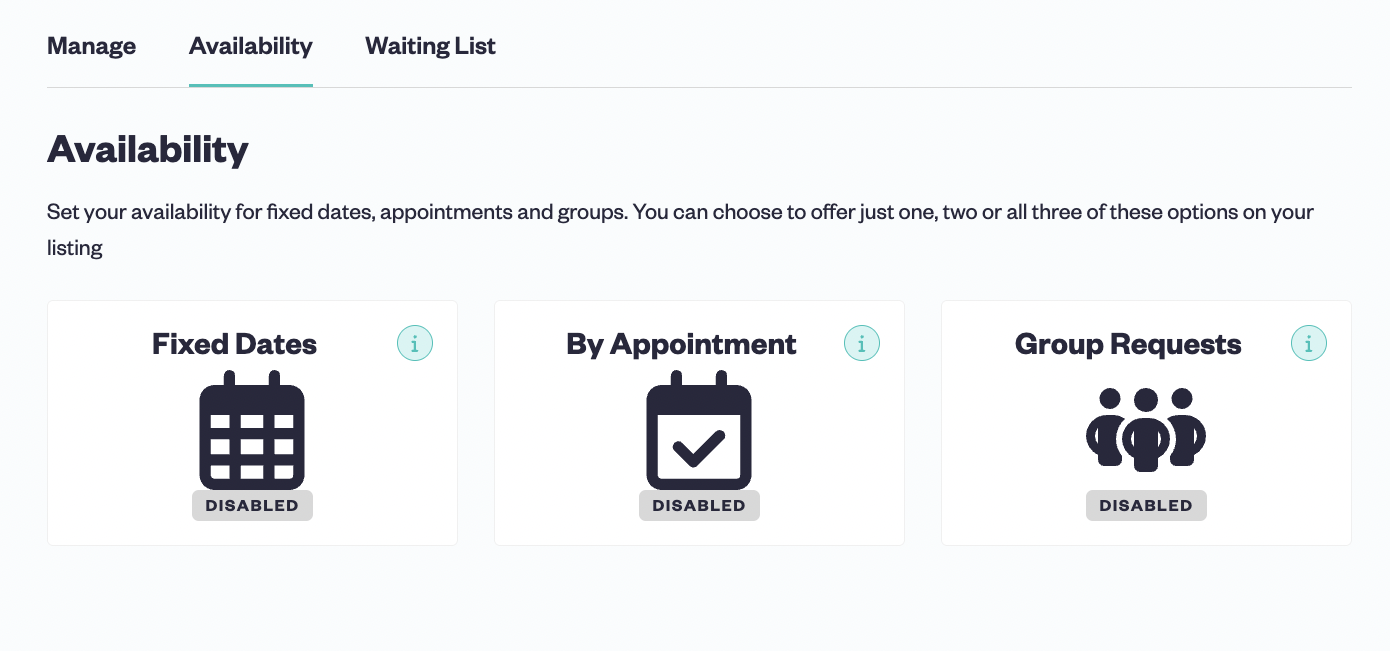
- Fixed Dates: Single or recurring sessions that can be booked by individual customers or groups until the session is sold out.
- By Appointments: Set your availability by day and allow customers to book slots in your calendar. Perfect for free consultations or sessions priced by duration.
- Group Request: Set your availability by day and allow customers to book as a private group.
Choose the option that best suits your offering.
Once you’ve done all this, you’re now ready to publish your first event!
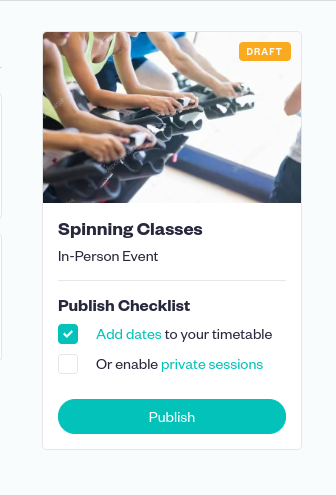
Hit publish, and hey presto!
Step 2 - Adding tutors
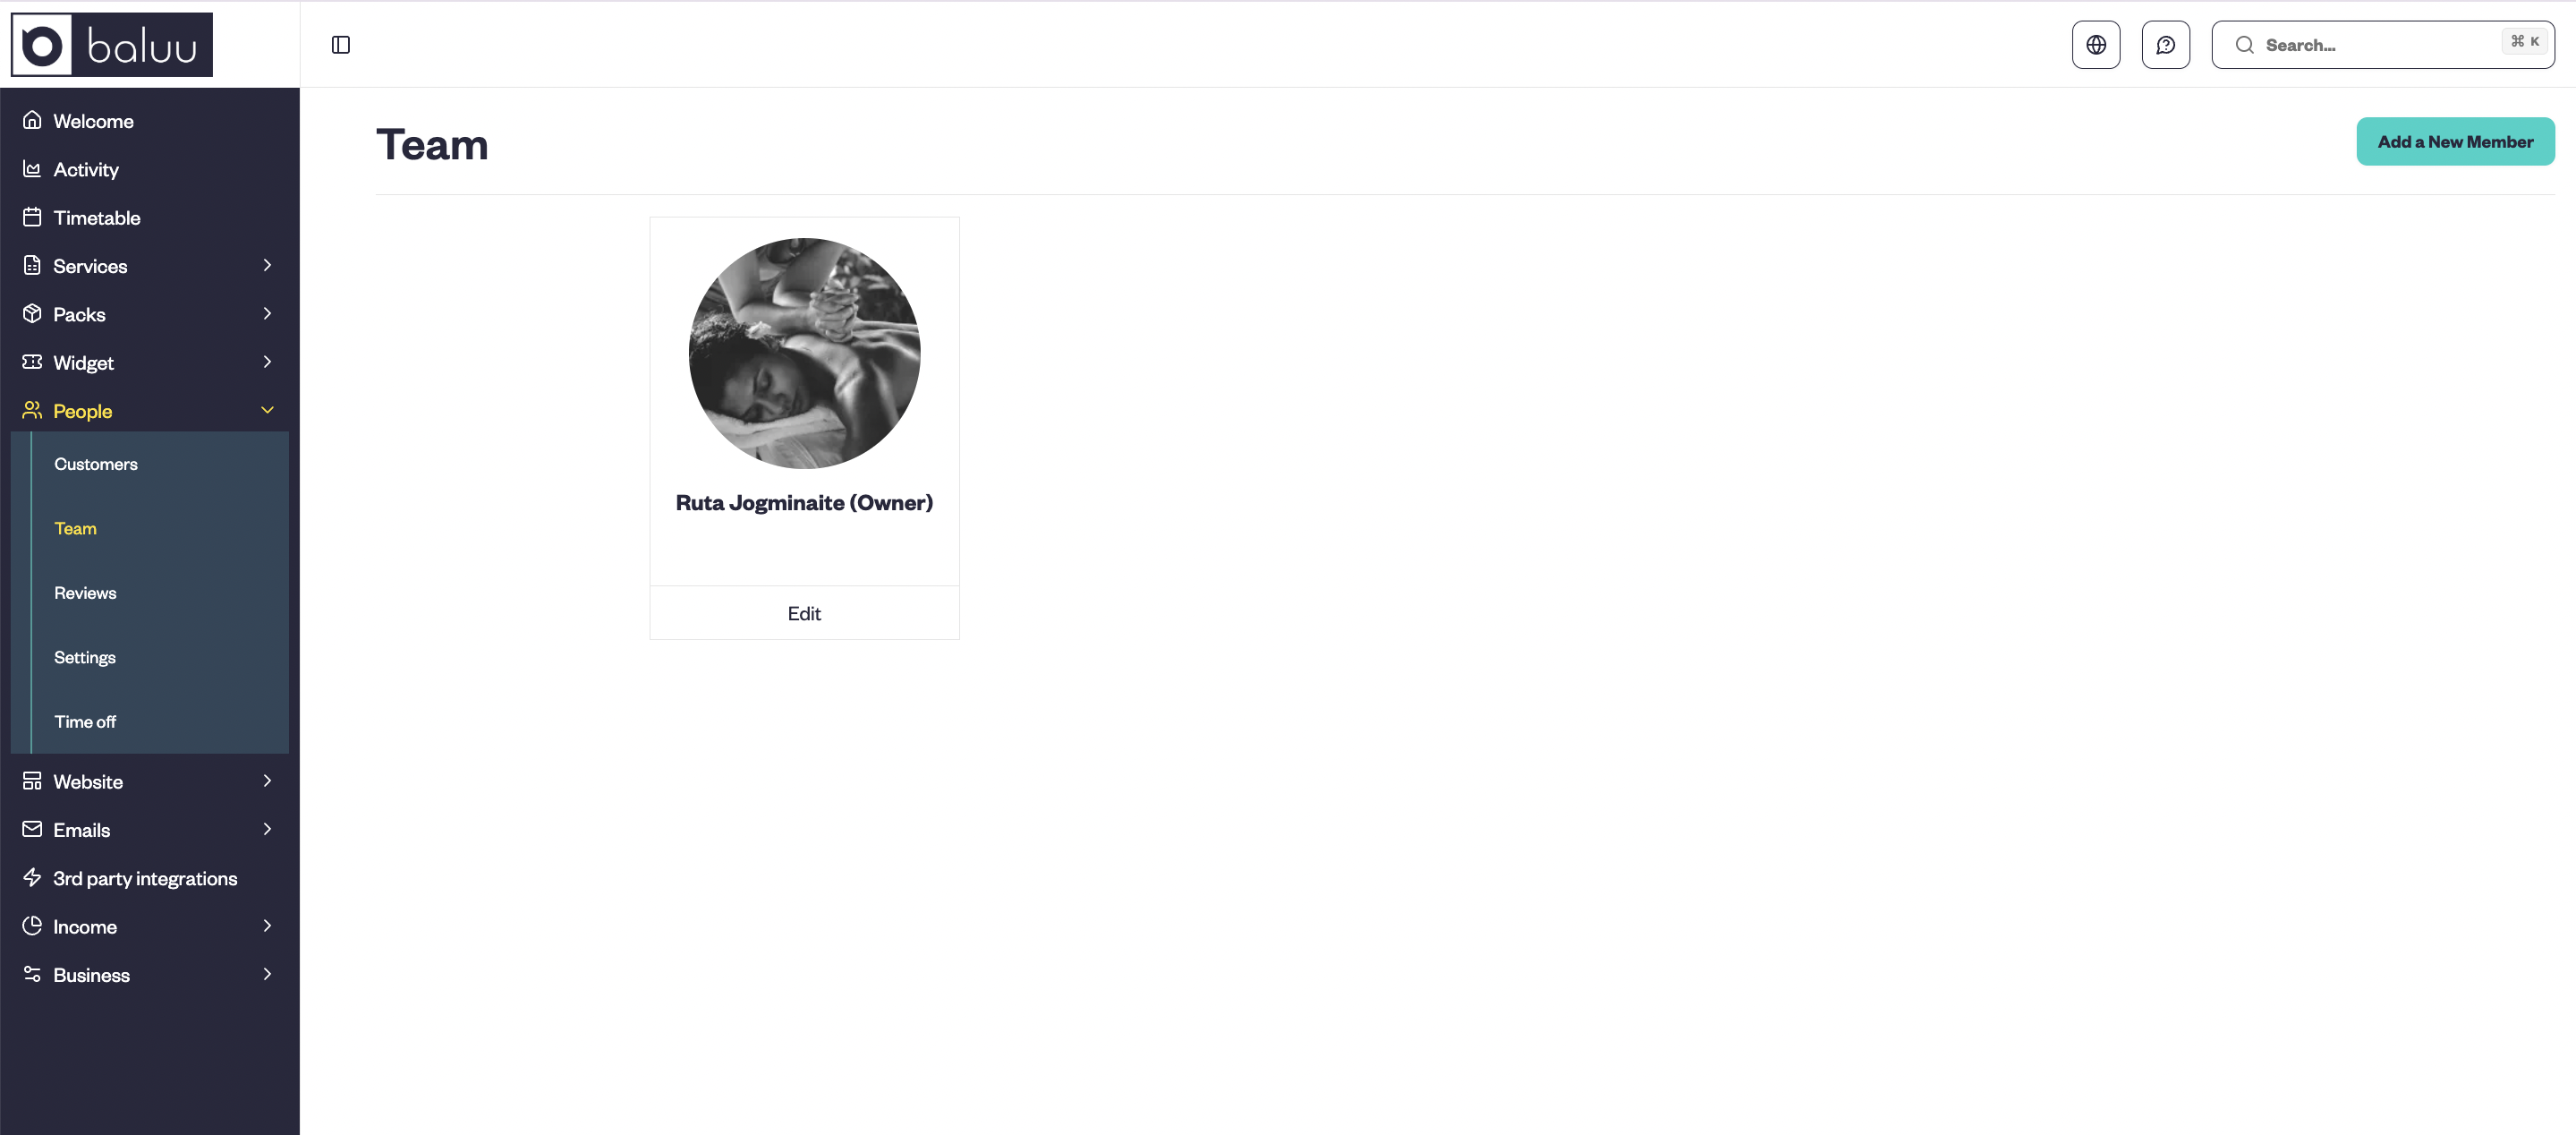
Secondly, let’s take a look at how to add tutors/instructors. Whether you have a large team or operate on your own, it’s essential your tutors have a bio and contact information filled out.
In the left-hand menu, click on Team. This will bring up a page showing all of your tutors. In the top right-hand corner, click Add a New Member.
This will bring up a window where you can add all the personal details of the instructor, including contact details, a short bio, a profile image, and social media handles.
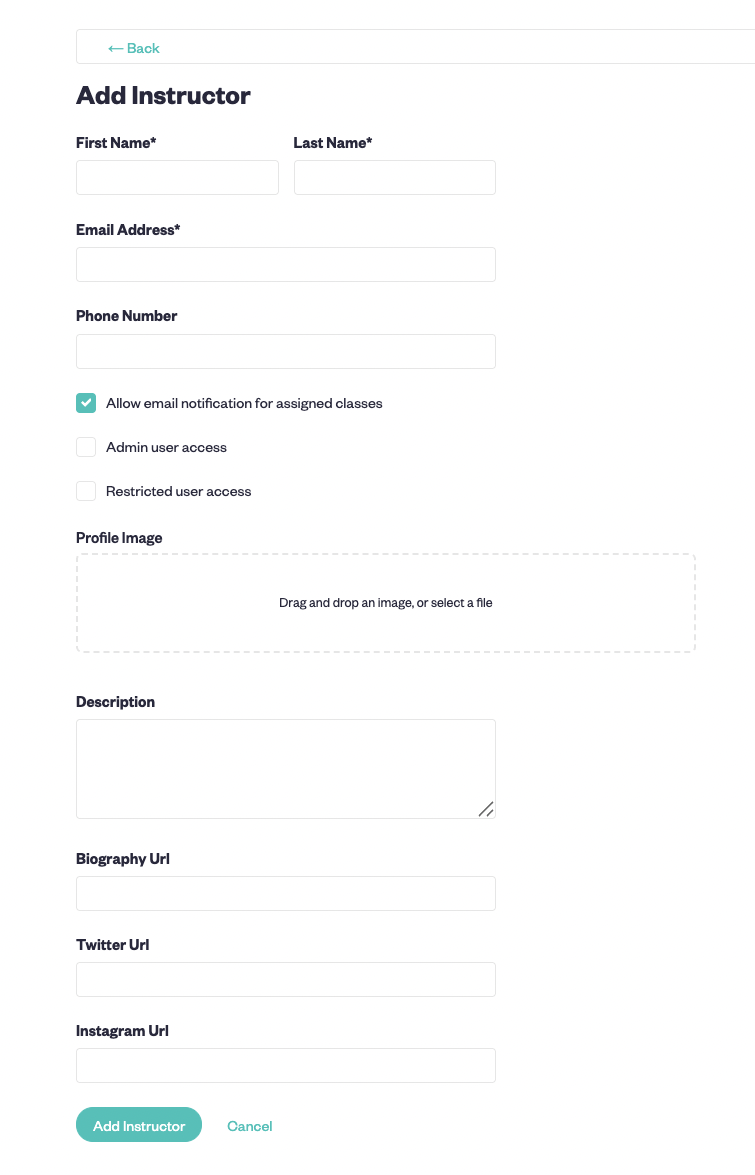
Then simply click Add instructor in the bottom right corner of the window. You can add as many instructors as you like.
Step 3 - Adding your calendar
To manage the dates and times of your event, click on the Timetable section in the left-hand menu. This will bring up an overview of all your listed events.
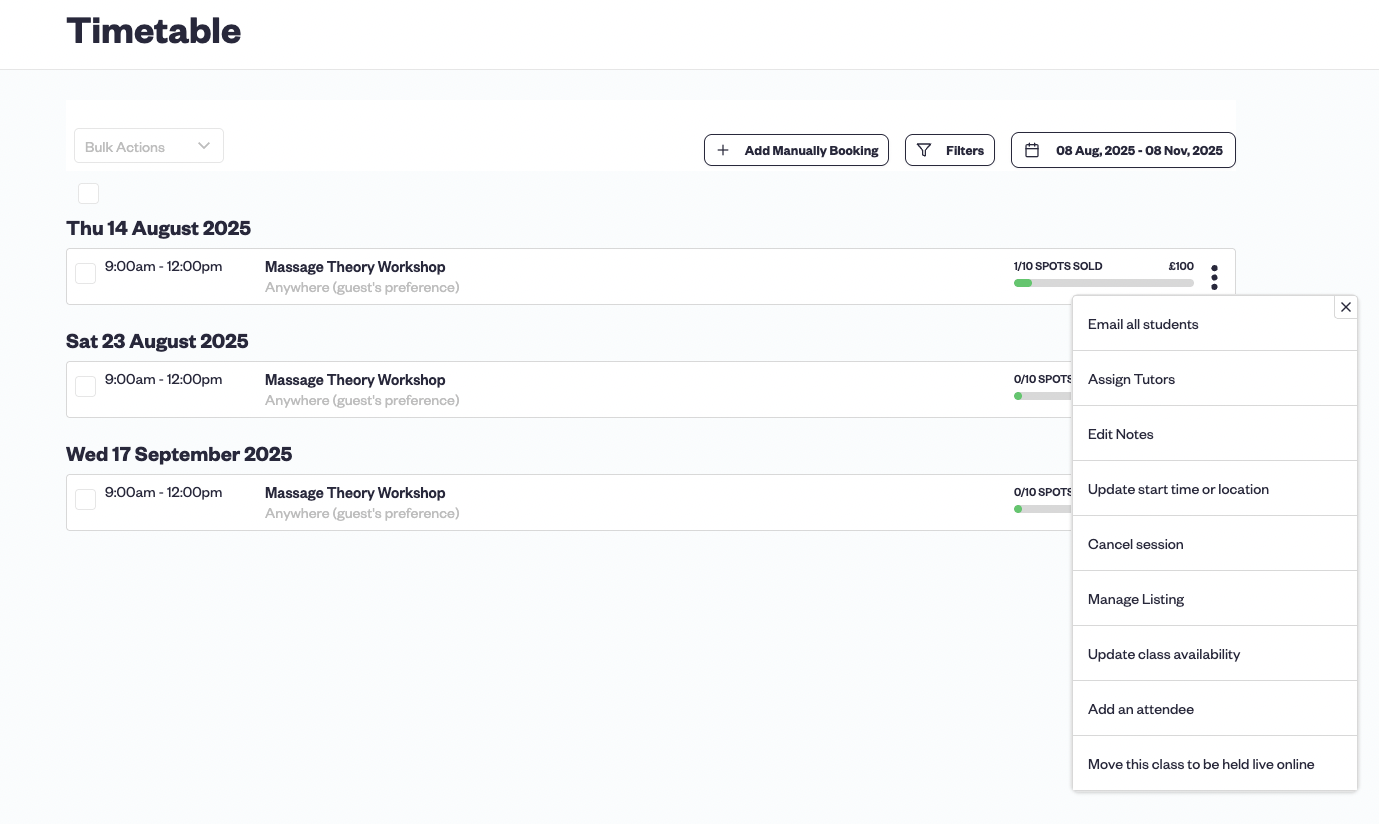
Above you can see the event we added along with the relevant information. Clicking on the three dots on the right side of the event will bring up a drop-down menu where you can add notes, update the date and time, edit information, choose between either live on online sessions, and more.
You’re able to view all your upcoming events in this section, edit them, and monitor attendees.
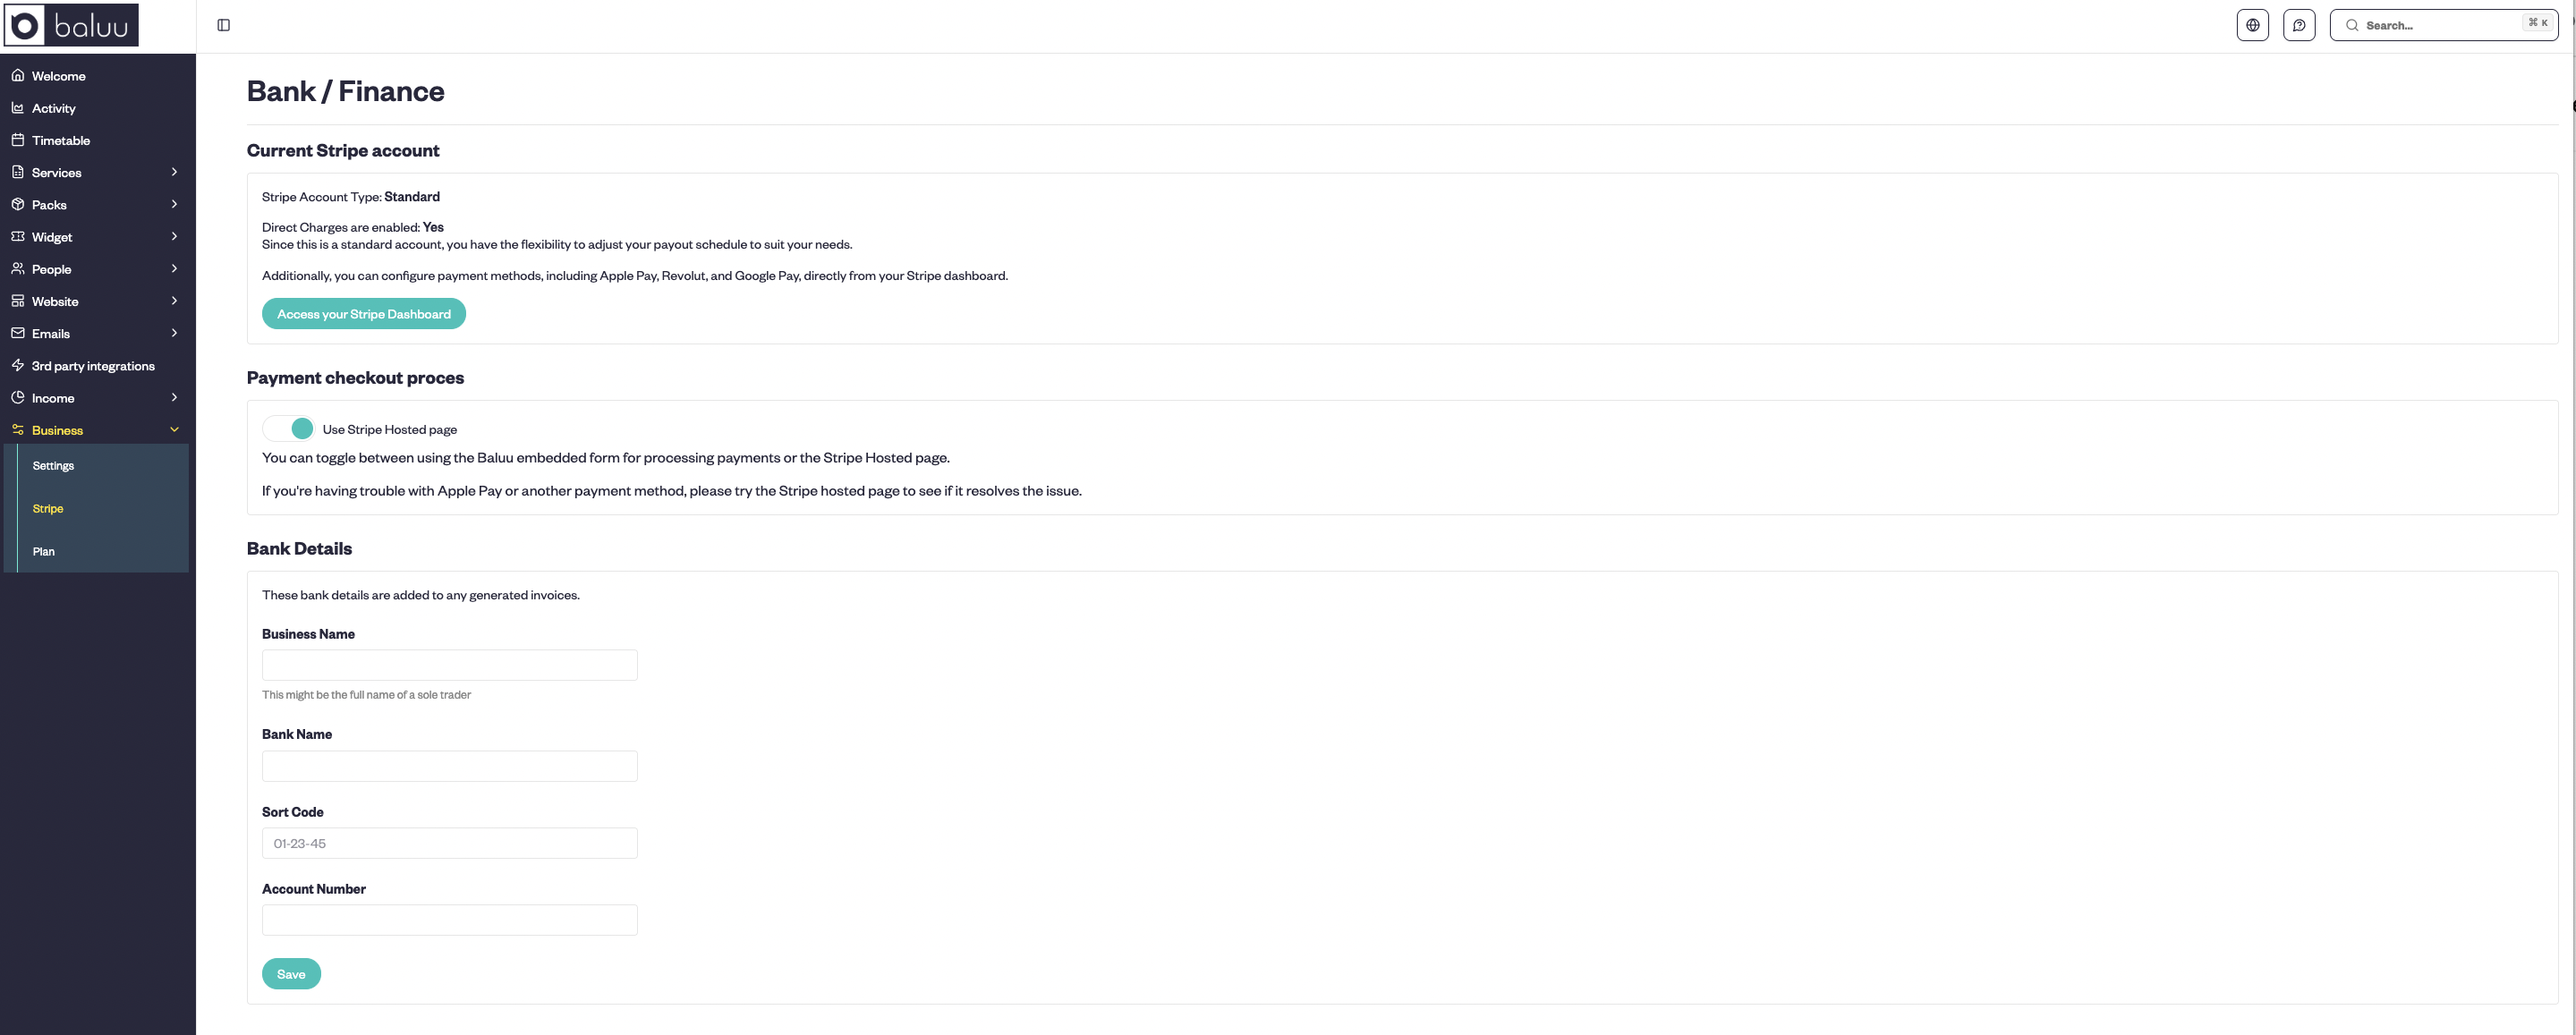
Step 4 -Setting up payments
To connect your Stripe account, go to the Business section in your Baluu dashboard, then click on 'Stripe'. Select 'Connect Your Stripe Account' and follow the prompts to enter all the required details. Once your account is successfully connected, you'll see the option to 'Access Your Stripe Account'. In this example, the Stripe account is already connected.
Step 5 -Adding custom forms/information
Baluu has many features that allow you to improve and grow your business. Among these is the ability to gather useful information from your clients.
In the All Events section, click Manage in your chosen event.
To begin with, let’s take a look at Notes & Emails.
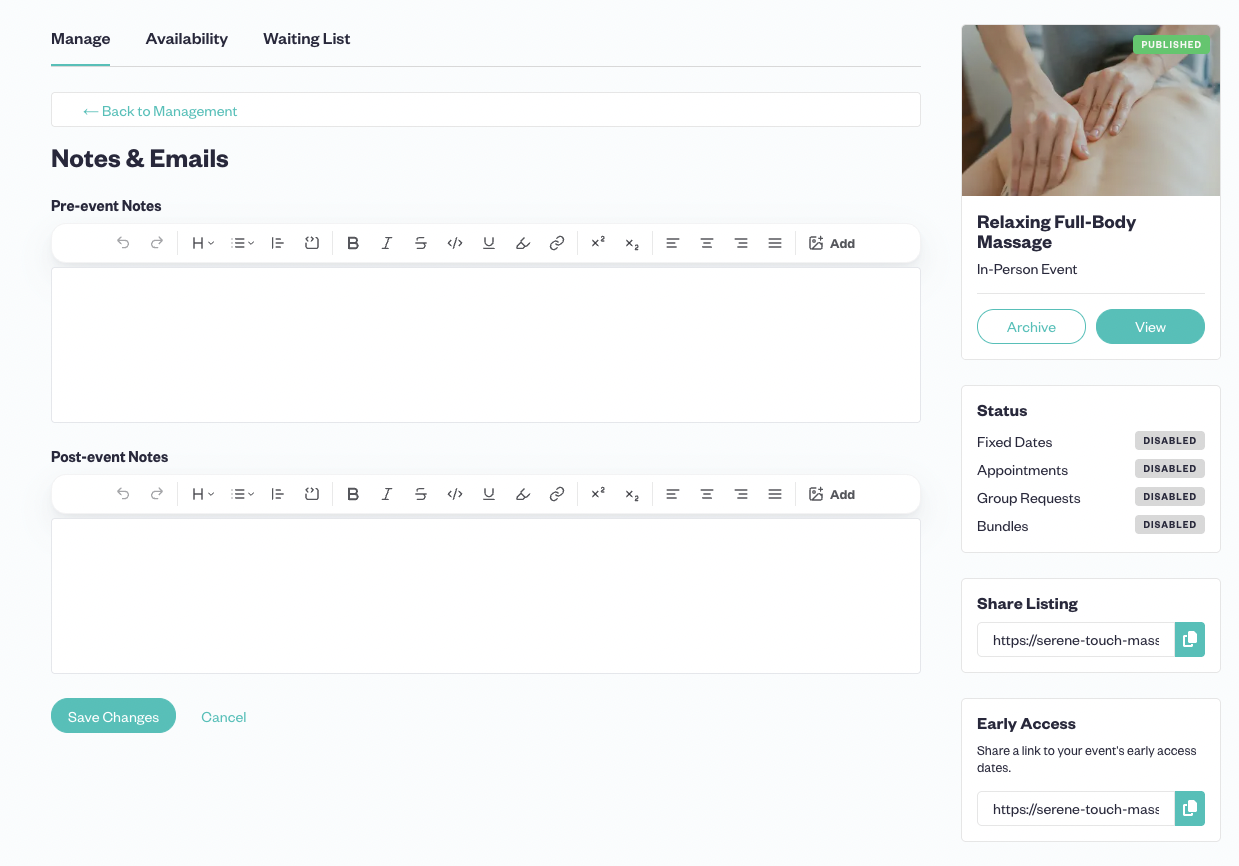
In this section, you can write pre-event and post-event notes that will be automatically sent to your customers. Not only can this can them know about your code of conduct, what they need to do to prepare, etc. but also share relevant content, and maintain good customer relations.
Next, let’s explore the Collect Customer Information feature. This allows you to request additional details from your customers during checkout.

Checkout questions are a great, non-intrusive way to gather valuable information about your clients. We recommend keeping your checkout questions as concise as possible to avoid making the process too time-consuming.
By answering some of the most common questions customers ask FAQs are an effective way of limiting the hours you’d normally have to allocate to customer service.
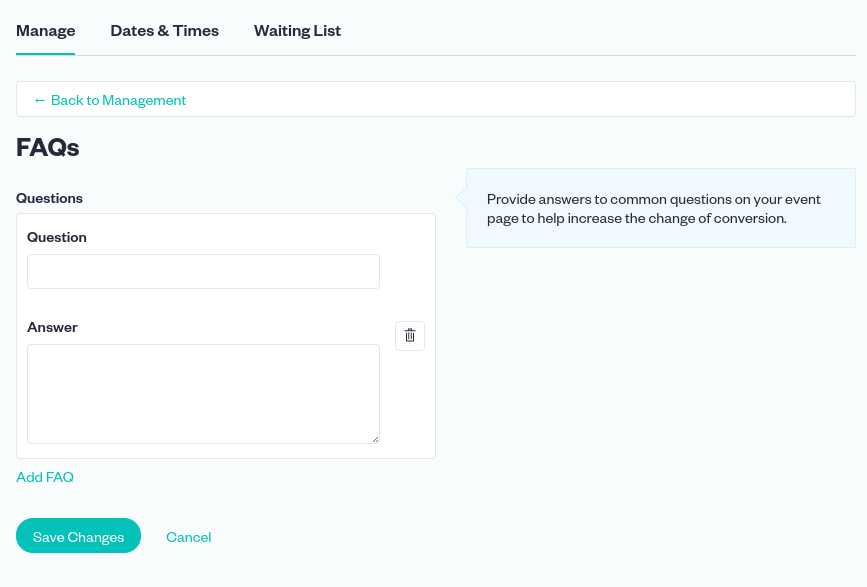
Simply write as many questions and answers as you think are appropriate, then these will appear on your Event page.
Today, given that most commerce takes place online, SEO (search engine optimisation) is an integral aspect of any business. Fortunately, Baluu knows this better than most.
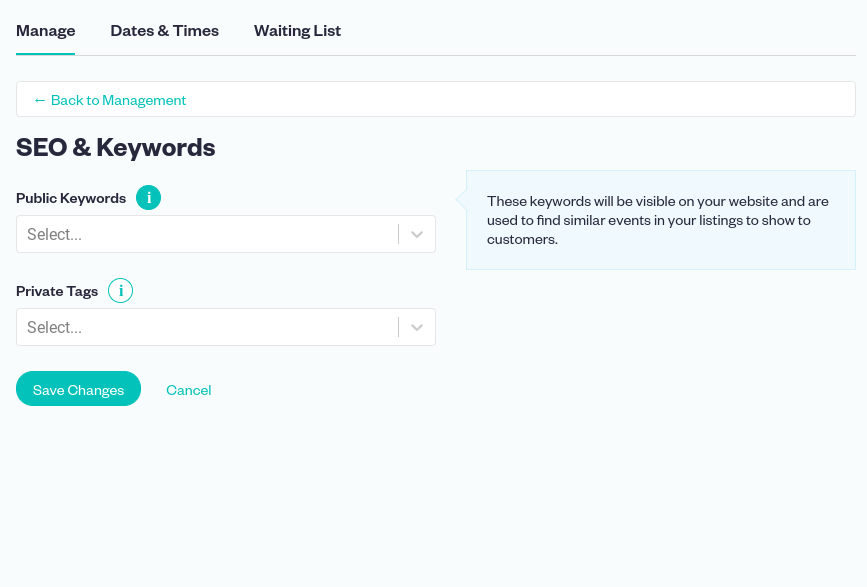
The SEO & Keywords section allows you to set Public Keywords and Private tags. Public Keywords will be visible on your website and are used to find similar events in your listings to show to customers.
Private Tags can be used to create additional landing pages on your website.
Sometimes, things happen, and you may have to cancel the event. Therefore, it’s essential you have a comprehensive Cancellation Policy to ensure good customer relations and not compromise conversions.
To set this up, go to Services, select Settings, and click on Terms and Conditions.
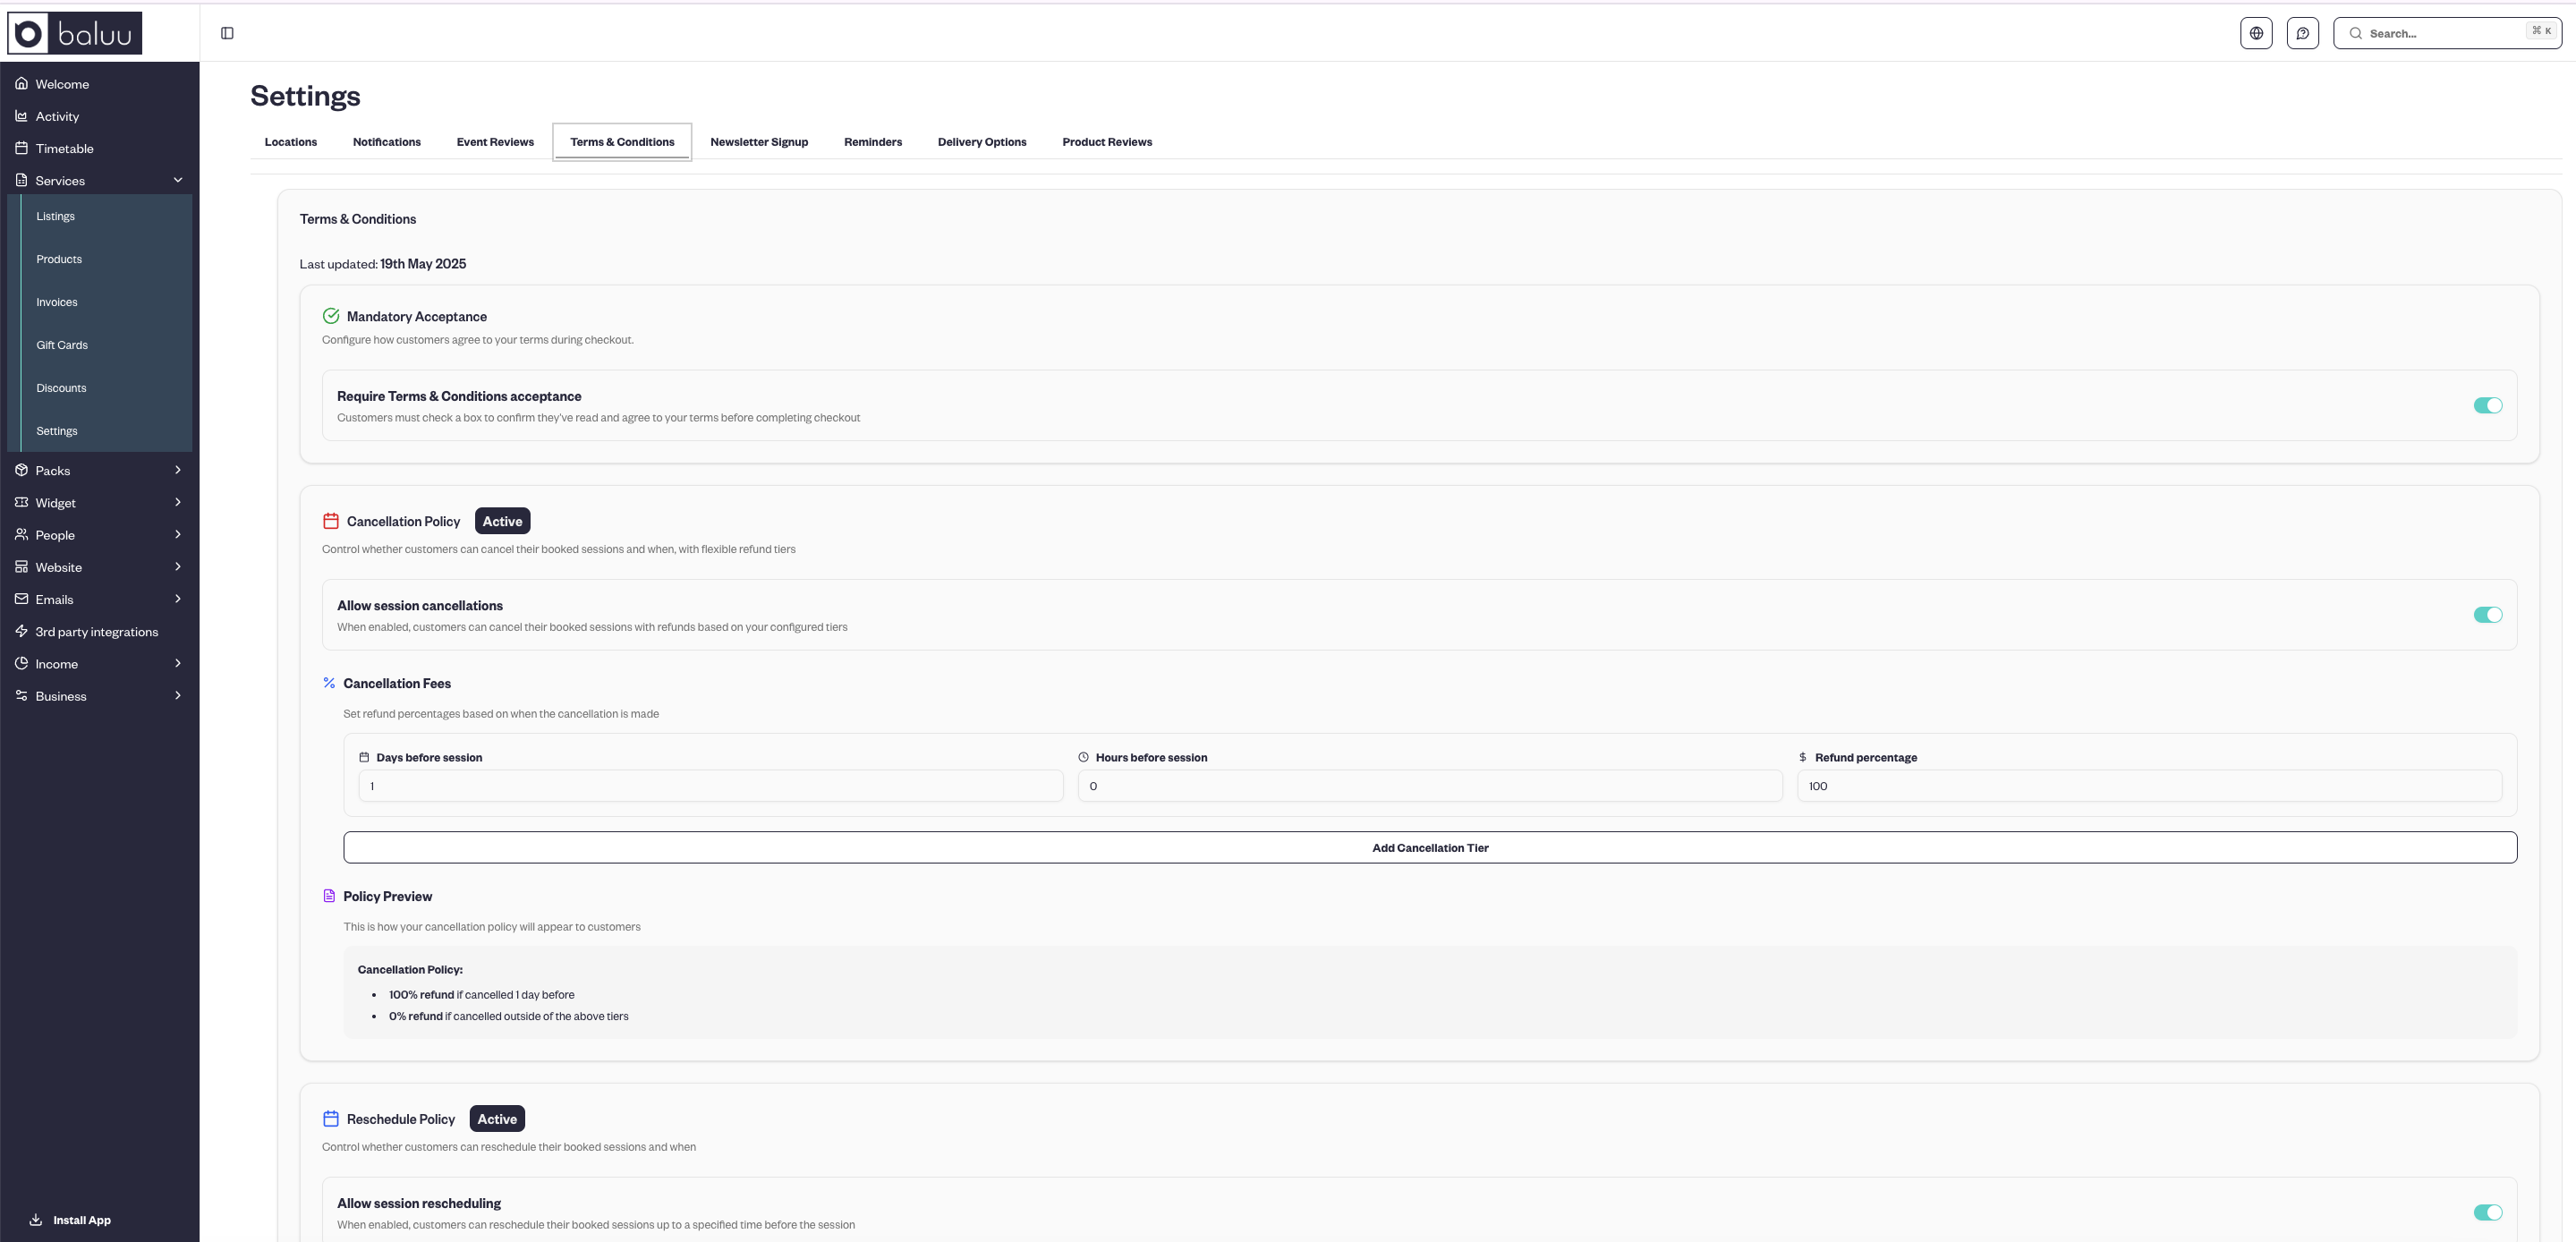
In this section you can provide the information relevant to cancelation. Choose your policy type. These are self-explanatory:
- Cancel or Reschedule allows customers to either cancel or reschedule their session.
- Reschedule Only means customers can't cancel but are allowed to reschedule to another session.
- No Cancelation means customers can't cancel or reschedule their session once booked.
In these sections, you can Include info like a Policy Cut-off, additional Event Terms, along with Private Event Terms (if applicable).
It’s important to note that it’s a legal requirement that any bookings can be cancelled or rescheduled within 24 hours of the booking being made, and these will always be allowed regardless of the policy created here.
Step 6 - Utilise Marketing Tools
Providing deals and discounts is a great way to improve your conversion rate. Fortunately, Baluu has the option to do so.
In the dashboard, under Services, click on Discount Codes from the drop-down menu. Then click New Code. The codes you create will be valid on your website for both your events and products.
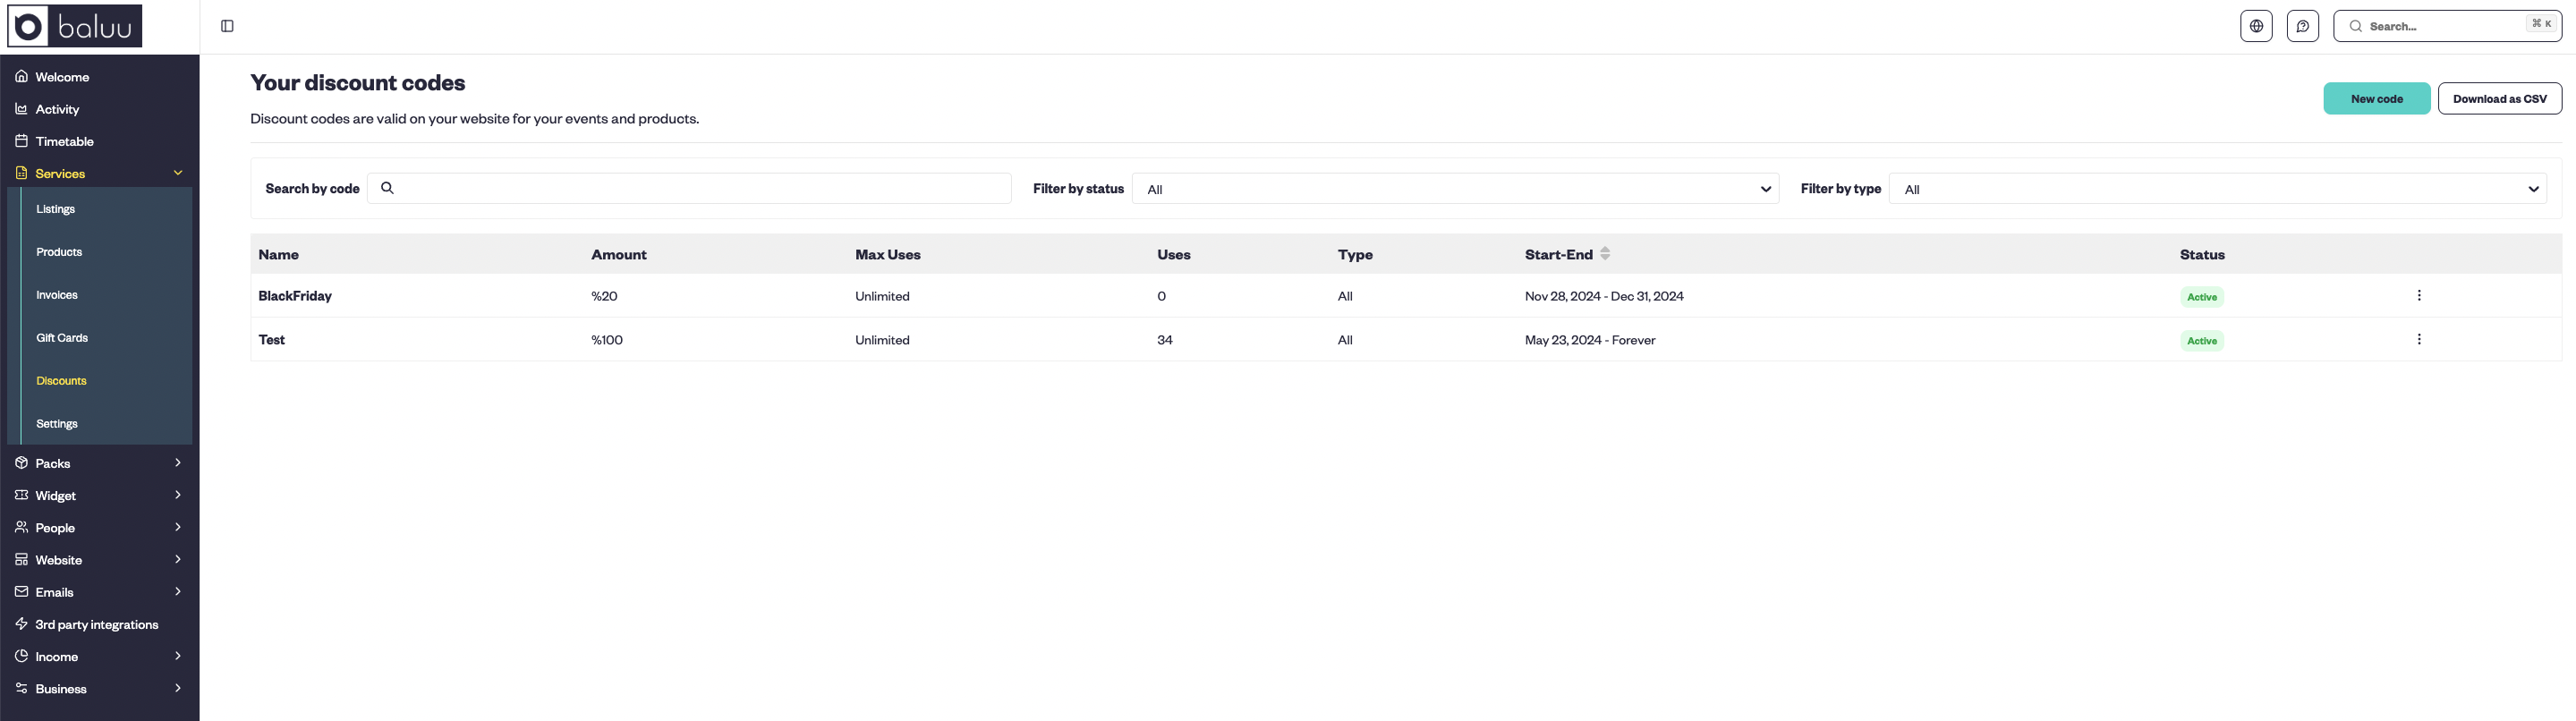
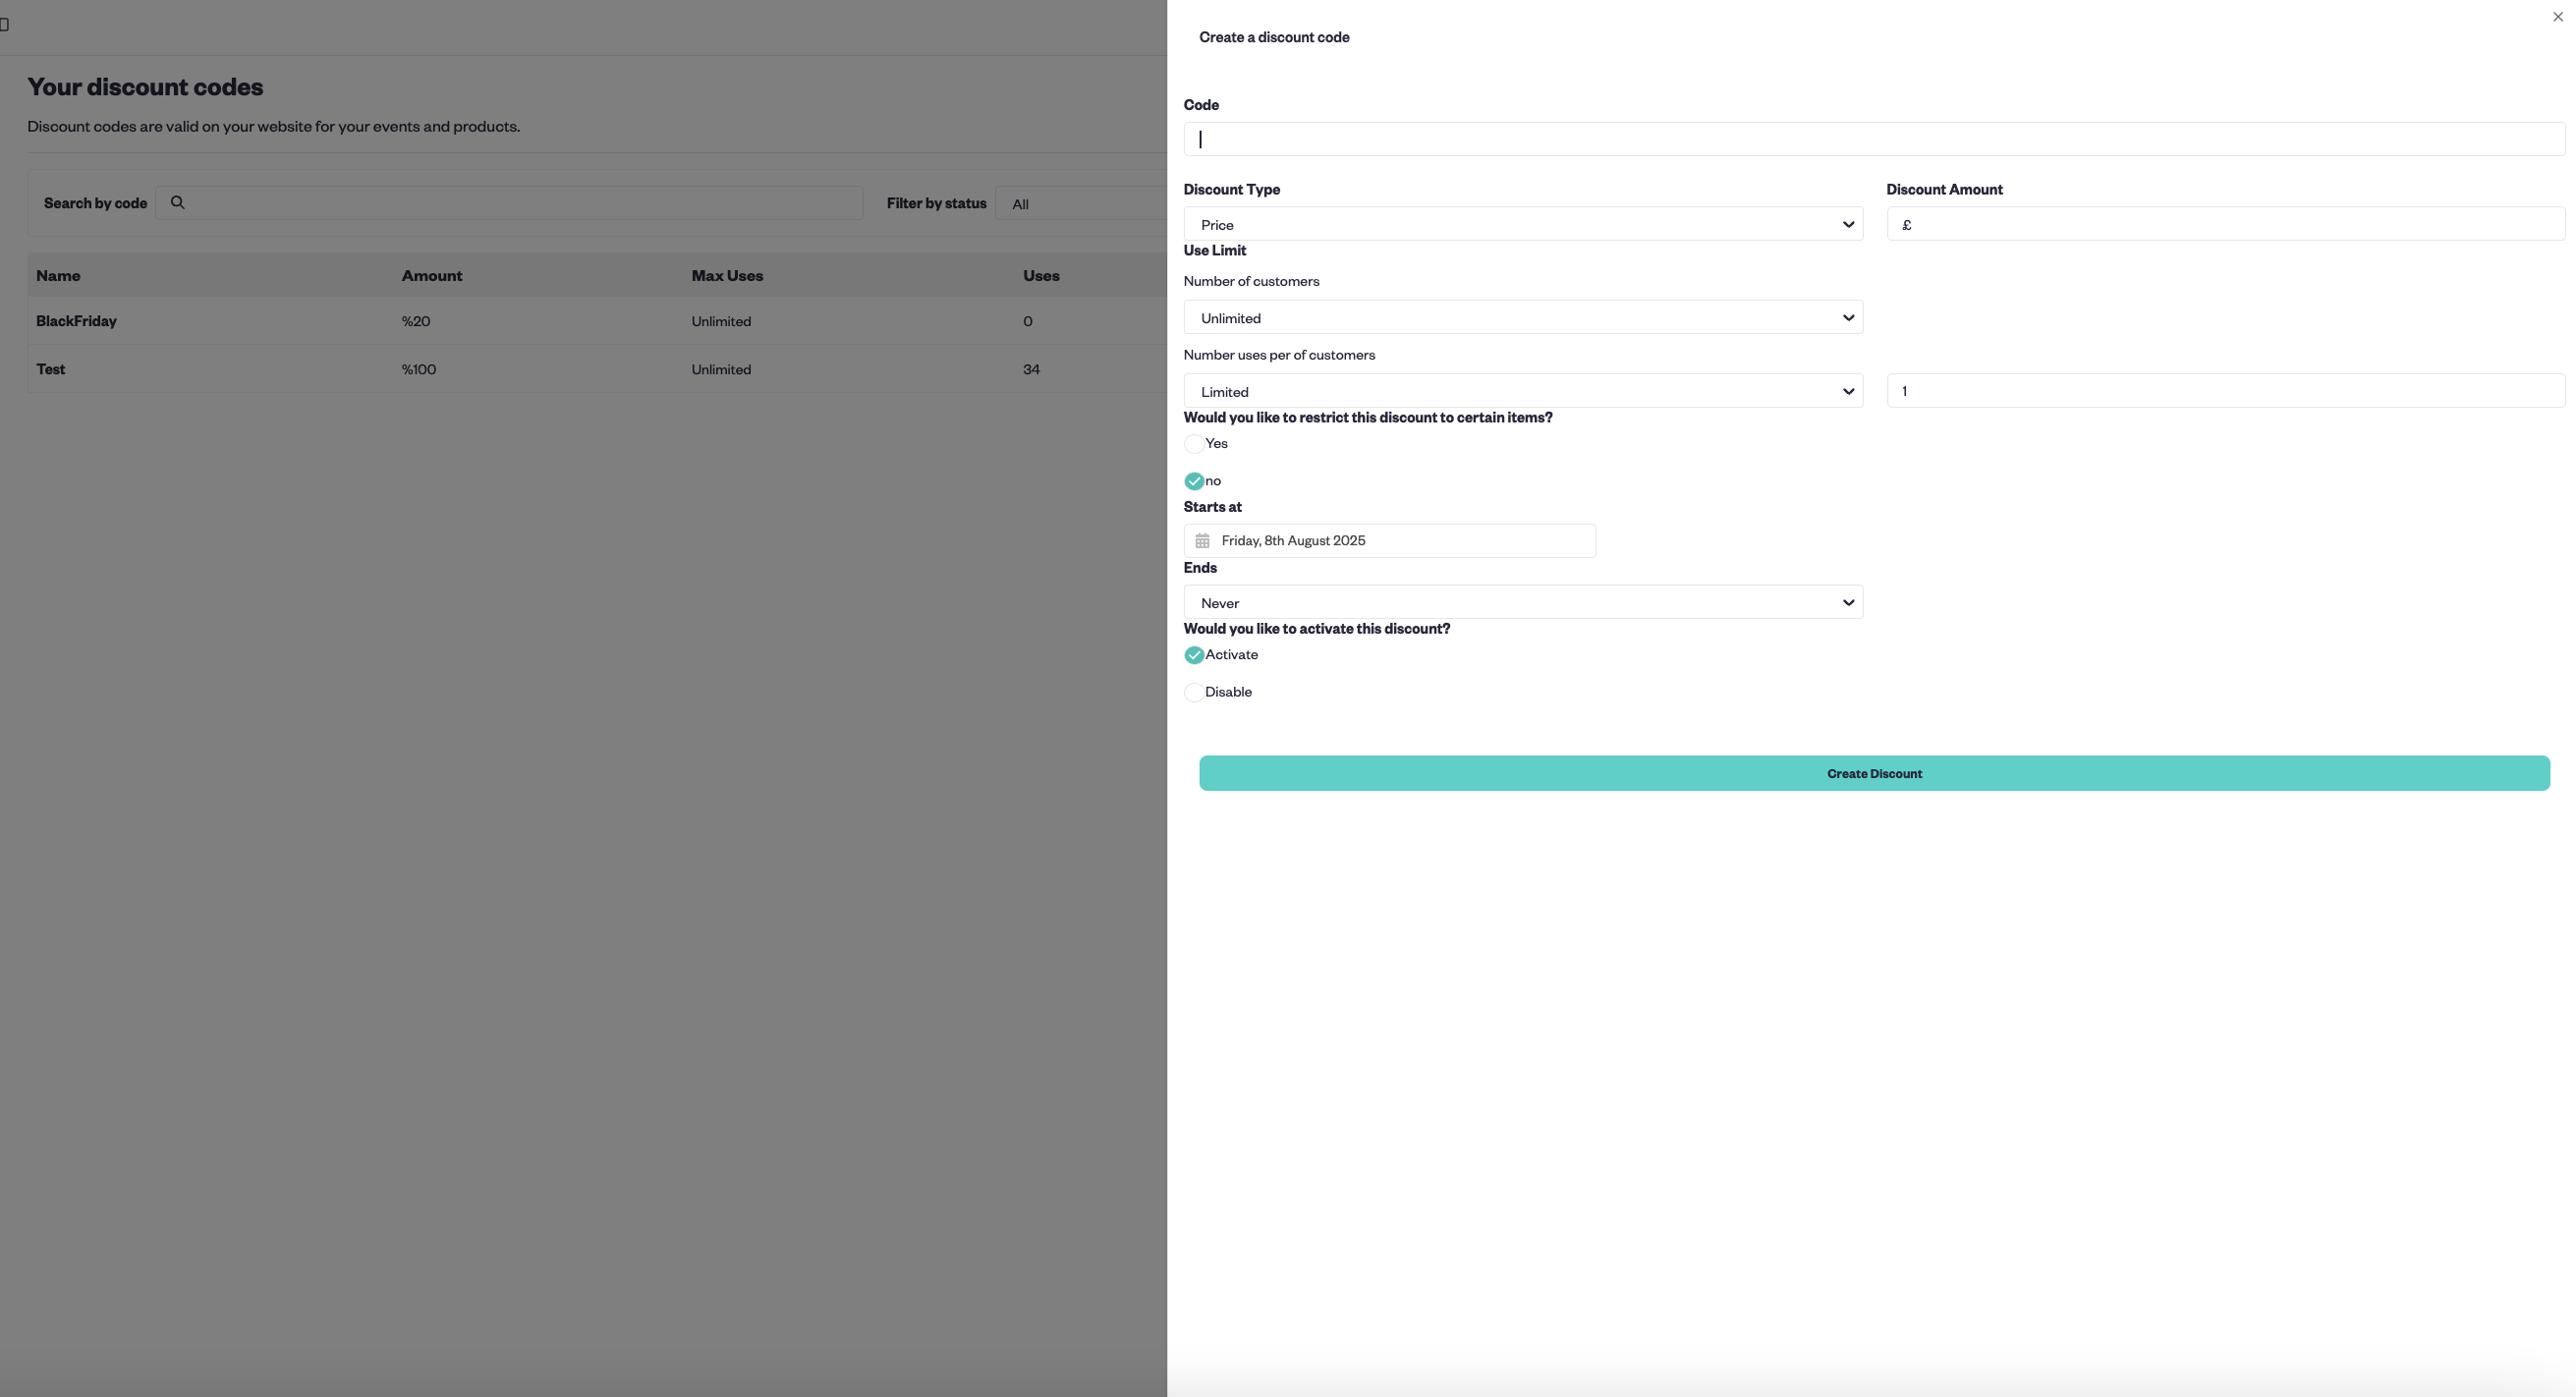
You can also offer gift cards, create bundles, and share your events on social media to further boost engagement and sales.
Step 7. Integrating the system on your existing website
While you’re able to build a booking website from scratch with Baluu, it also has the option of integrating its booking system with your existing site
To do this, click on Widget, then select Embed Code.
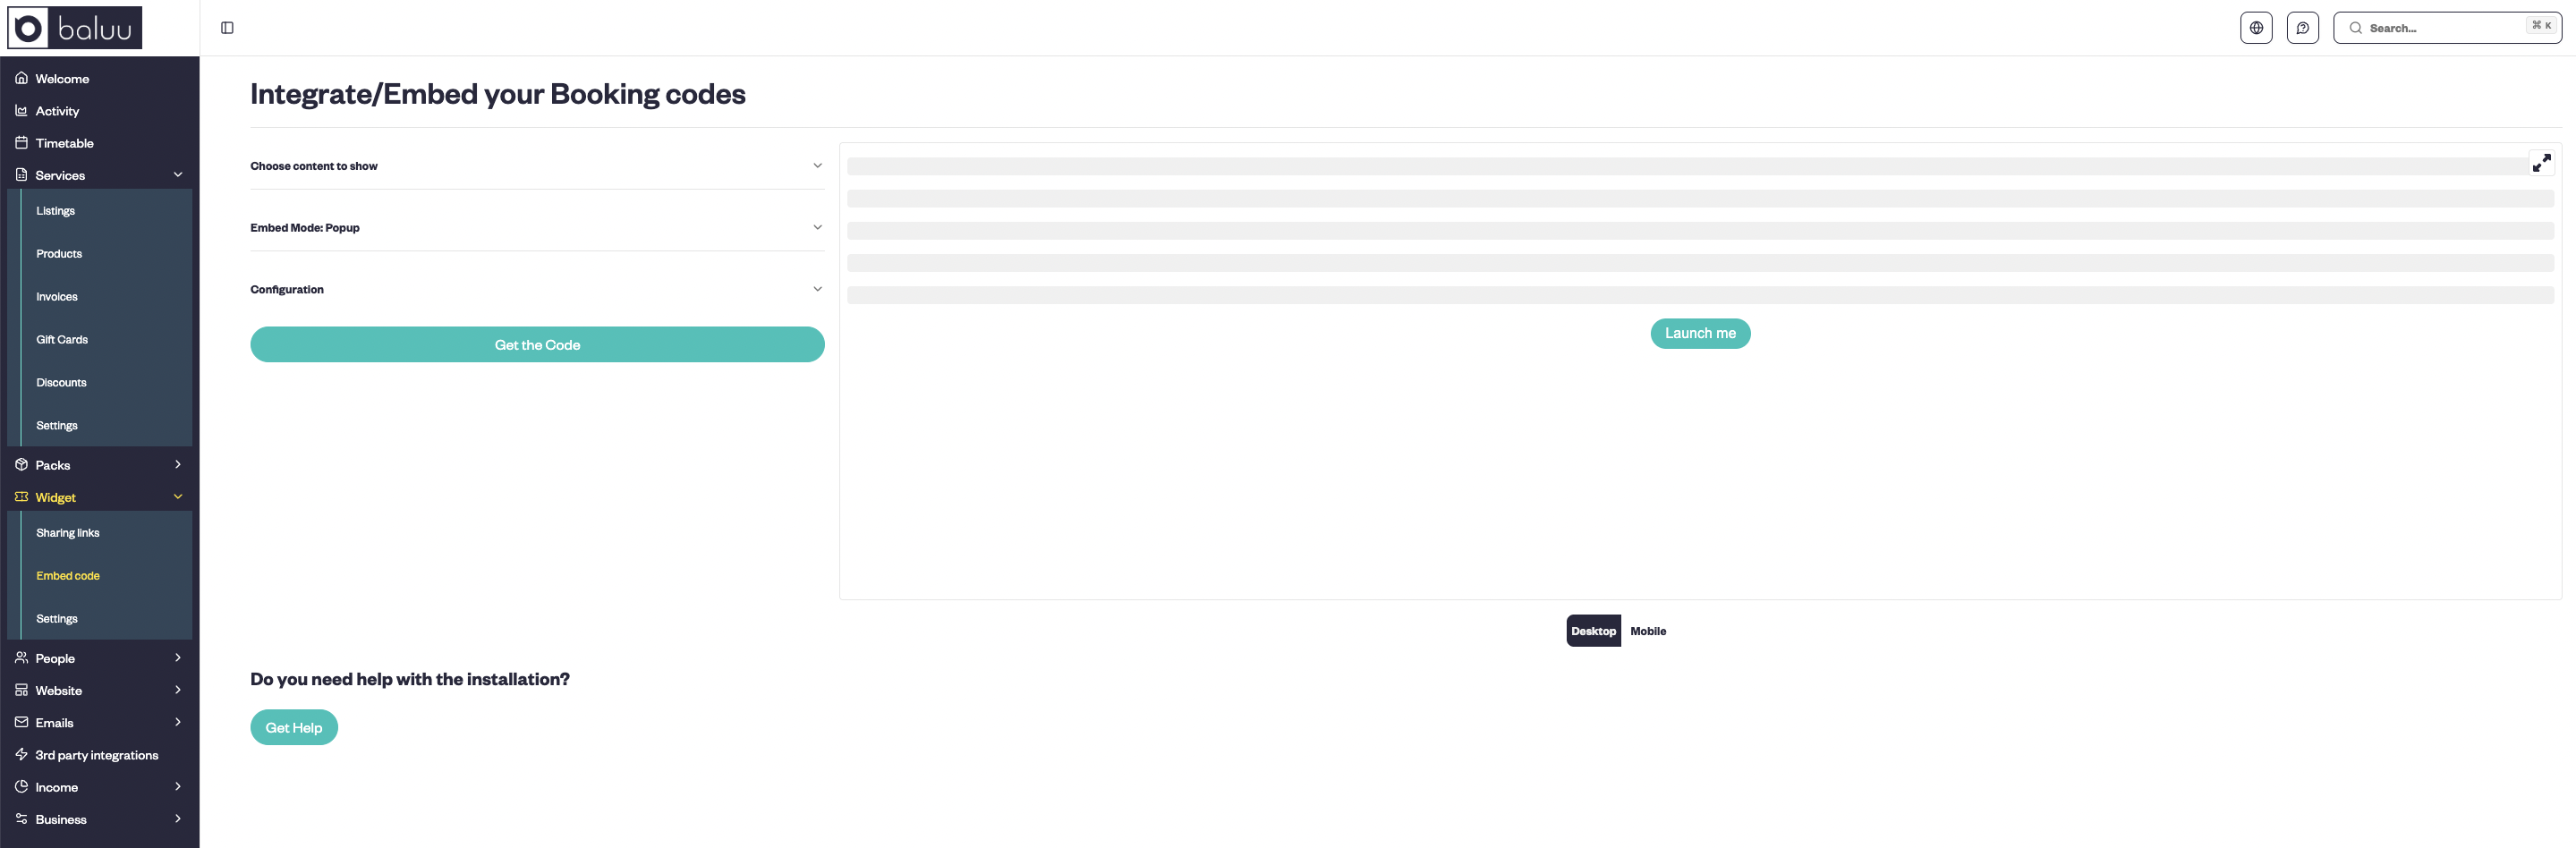
To integrate the booking system with your existing website, all you have to do is copy the HTML code provided to add a Book Now button to your website. It’s as simple as that.
And don’t worry if you’re struggling with any of this, as Baluu’s customer service team is always on hand to help.
Step 8 - Using Baluu as your main website
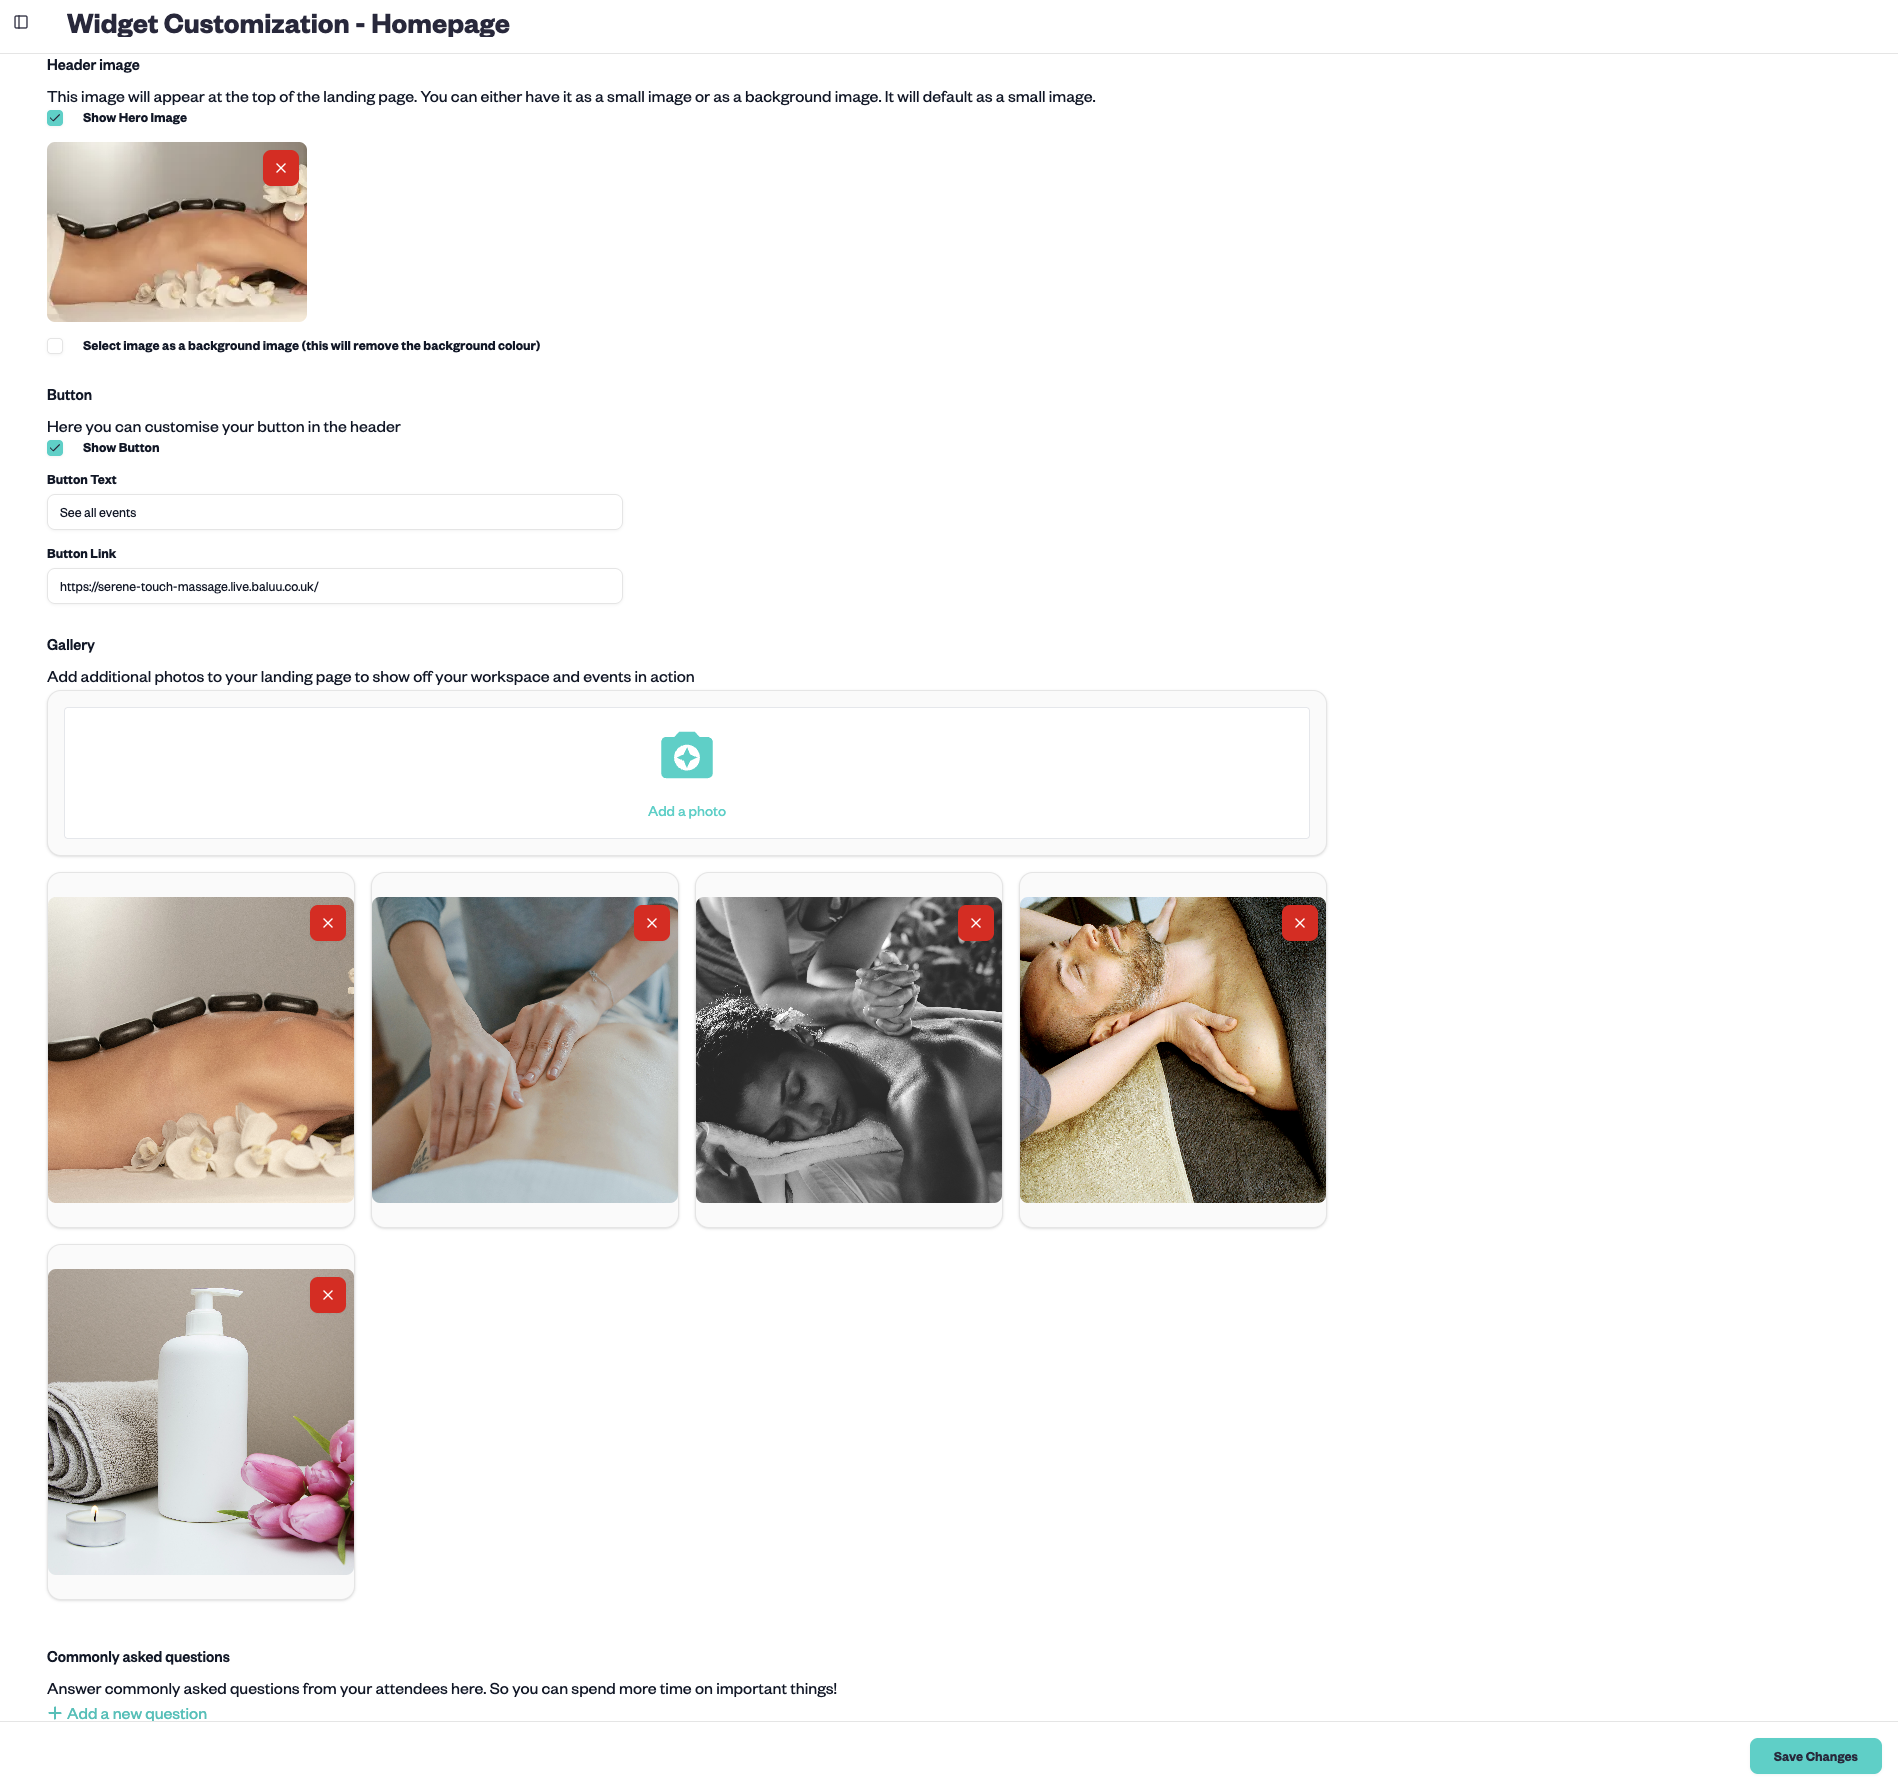
To make the most of what Baluu has to offer, you can also use their in-built website builder. To build a website from scratch—Click on Website, then Pages to start designing your website.
In the Pages Management section, you can manage and customise all your website pages. This includes your core pages like the Homepage, Events, Timetable, Products, Contact, and About Us. You can also create and edit additional pages such as Landing Pages, Blog, Calendar, Reviews, and more.
Each page can be easily accessed, enabled/disabled, or edited using the Actions menu. This setup makes it simple and intuitive to tailor your site content to your brand and customer needs.
.png?_a=BAMABkeA0)
Add relevant information like titles and descriptions, and change the font and background colours to ones of your choice. To do so you have to input the HTML code for the colours you want. This may sound tricky, but sites like HTML Colour Codes allow you to easily the colour codes you want.
Conclusion
As we’ve shown, making a booking system with Baluu is a walk in the park. What separates Baluu from other online booking systems isn’t only its ease of use, but how much functionality you get for an affordable subscription fee. Even though it's a relatively young company, many small businesses are using Baluu’s booking system to great effect. So say goodbye to developer fees and finicky coding; say hello to a streamlined workload, and a beautiful, efficient booking system!
Need more advice?
Have a read of some related guides on the Baluu blog below, or book a demo with one of our friendly team today. We'll be happy to walk you through the Baluu system and how it can help you manage and grow your bookings business.
- Top 10 Best Online Booking Systems
- How To Make A Bookings Website: A Step By Step Guide
- Top 10 Best Booking Systems For Small Businesses
- Top 6 Best Scheduling Tools For Google Calendar
- Top 5 Best Appointment Booking Systems For Any Business
About Ruta Jogminaite
Expert in booking systems and appointment-based business optimization.
-2.png%3F_a%3DBAMABkeA0&w=3840&q=75)

.jpeg%3F_a%3DBAMABkeA0&w=3840&q=75)